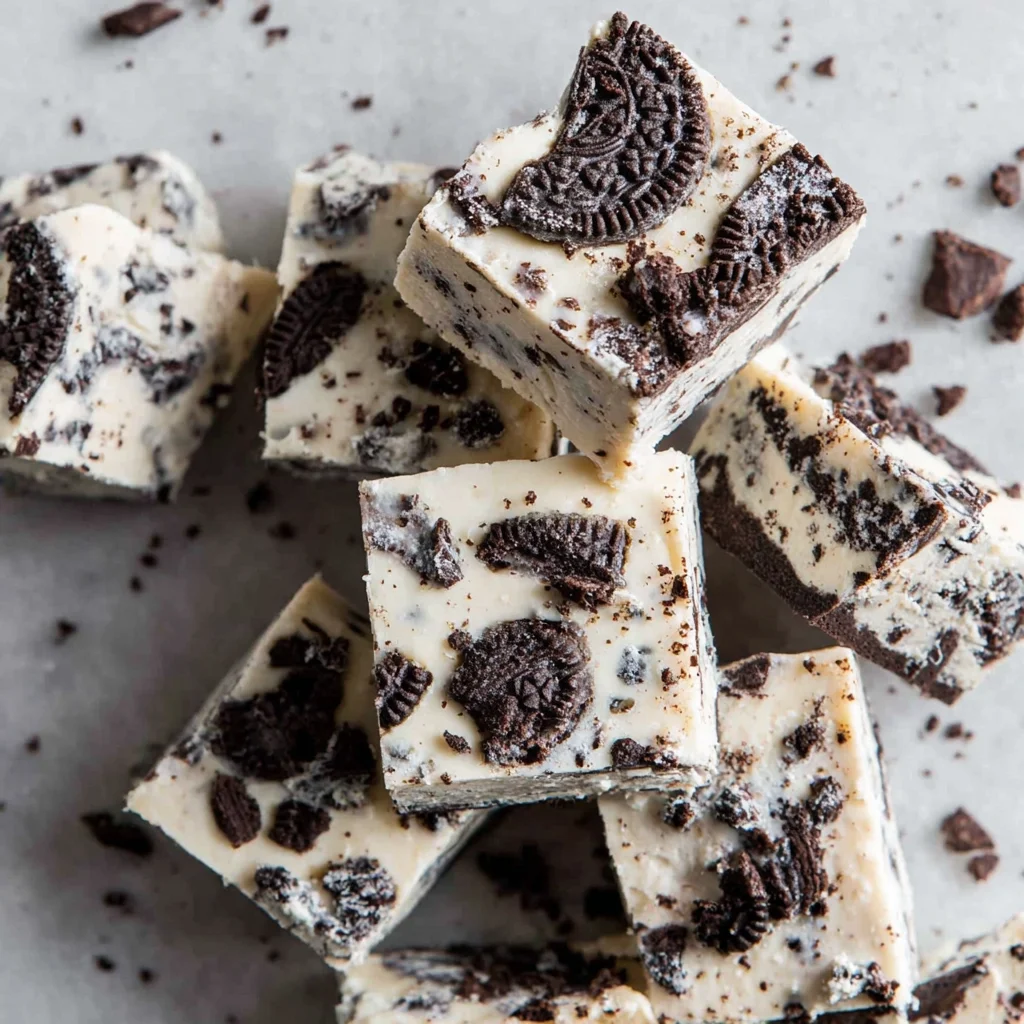
Dive into a world of decadent delight with this irresistible Oreo Fudge recipe! Forget complicated baking projects – this no-bake treat is incredibly easy to make, requiring minimal effort and delivering maximum flavor. Imagine the rich, creamy texture of chocolate fudge, perfectly complemented by the crunchy bite of crushed Oreos. It’s the perfect dessert for any occasion, from casual weeknight gatherings to festive holiday celebrations. Whether you’re a seasoned baker or a kitchen novice, this Oreo Fudge recipe is your ticket to dessert success. The satisfying crunch of the Oreos against the smooth, melt-in-your-mouth fudge is a delightful contrast that will leave you wanting more. This recipe is guaranteed to become a family favorite, a go-to dessert for potlucks, and a delicious way to impress your guests. Get ready to experience the ultimate Oreo Fudge indulgence!
Why You’ll Love This Oreo Fudge Recipe
This Oreo Fudge recipe isn’t just another dessert; it’s an experience. There are several reasons why you’ll absolutely adore this recipe and why it deserves a prominent spot in your recipe repertoire. First and foremost, it’s incredibly easy! No oven required, no complicated techniques to master – just simple steps that anyone can follow. This makes it perfect for busy weeknights when you crave a delicious treat without the fuss. Second, the flavor combination is unbeatable. The rich, creamy chocolate fudge is the ideal backdrop for the iconic crunch of crushed Oreos. This delightful contrast of textures and tastes is what makes this Oreo Fudge so irresistible. Third, it’s incredibly versatile. You can easily customize this recipe to your liking, adding different mix-ins or using different types of chocolate. Feel free to experiment and create your own unique variations! Lastly, the presentation is stunning. This Oreo Fudge looks as good as it tastes, making it perfect for parties, holidays, or simply enjoying a sweet treat with loved ones. This simple yet elegant dessert is sure to impress your guests and leave them wanting more. Check out our other amazing dessert recipes for more inspiration!
Why You Should Try This Oreo Fudge Recipe
In a world filled with countless dessert recipes, this Oreo Fudge stands out for its exceptional qualities. Consider this your invitation to embark on a culinary journey filled with simple indulgence. This recipe is not merely a dessert; it’s a testament to the beauty of effortless elegance. The ease of preparation is unparalleled. No complex baking procedures or specialized equipment are necessary. This makes it perfect for beginners, those short on time, or anyone seeking a stress-free dessert-making experience. The deliciousness speaks for itself. The rich, decadent chocolate fudge perfectly complements the delightful crunch of the Oreo cookies, creating an irresistible taste sensation that leaves you craving more. The satisfaction is undeniable. The simple act of creating this treat, witnessing its transformation from ingredients to a beautiful, edible masterpiece, is a satisfying culinary experience in itself. Beyond personal enjoyment, this Oreo Fudge recipe is a wonderful opportunity for shared experiences. It’s an excellent activity for family gatherings or baking with friends. Impress your guests with a delicious dessert that is as easy as it is delightful. Try another delicious dessert recipe like our Easy Chocolate Fudge.
Ingredients and Utensils for Perfect Oreo Fudge
Gathering the right ingredients and utensils is crucial for a successful Oreo Fudge recipe. This section outlines everything you’ll need, ensuring you’re fully prepared to create this delectable treat. Using high-quality ingredients will significantly enhance the final flavor, guaranteeing a truly memorable dessert experience. Precision in measurements will also ensure optimal texture and consistency.
- Oreo Cookies: 1 (14-ounce) package of Oreo cookies, finely crushed. Reserve about ¼ cup for topping. Using a food processor for crushing ensures a consistent texture. Consider using a variety of Oreos, like mint or double-stuffed, for unique flavor profiles.
- Sweetened Condensed Milk: 1 (14-ounce) can. This provides the creamy richness that is central to the fudge’s texture. Using full-fat sweetened condensed milk is recommended for optimal results.
- Semi-Sweet Chocolate Chips: 1 (12-ounce) package. Opt for high-quality chocolate chips for the best flavor. You can experiment with dark chocolate, milk chocolate, or even white chocolate chips for variations.
- Unsalted Butter: ½ cup (1 stick). This contributes to the smooth and creamy texture of the fudge. Using unsalted butter allows you to control the sweetness level.
- Vanilla Extract: 1 teaspoon. A touch of vanilla enhances the overall flavor profile and adds a subtle warmth. Pure vanilla extract is preferred for its superior flavor.
- 8×8 inch Baking Pan: A square pan is ideal for even distribution and easy cutting. Using a pan slightly larger or smaller can affect the fudge’s thickness.
- Parchment Paper: Line the pan to prevent sticking and make removal easier. The overhang will allow you to easily lift the set fudge out of the pan.
- Double Boiler or Microwave-Safe Bowl: Choose the method you’re most comfortable with for melting the chocolate and butter. If using a microwave, melt in 30-second intervals, stirring frequently to avoid burning.
- Rubber Spatula or Wooden Spoon: Essential for stirring the ingredients together smoothly and evenly. A sturdy spatula is recommended for scraping down the sides of the bowl.
- Measuring Cups and Spoons: Precise measurements are key for consistency. Use accurate measuring tools to achieve the desired results.
- Food Processor (Optional): Significantly speeds up the process of crushing the Oreos, ensuring a more uniform texture.
Detailed Step-by-Step Oreo Fudge Recipe
Creating this amazing Oreo Fudge is easier than you think! Follow these steps meticulously for perfectly smooth and delicious results. Each step is crucial to the final outcome, so take your time and enjoy the process.
- Prepare the Pan: Line an 8×8 inch baking pan with parchment paper, ensuring there is an overhang on at least two sides for easy removal of the fudge later. This step is critical to prevent sticking and make the process easier.
- Melt the Chocolate and Butter: Melt the chocolate chips and butter together using either a double boiler or a microwave-safe bowl. If using a double boiler, make sure the bottom pot doesn’t boil; maintain a gentle simmer. If using a microwave, melt in 30-second intervals, stirring thoroughly after each interval to prevent burning. The mixture should be smooth and completely melted.
- Combine Wet Ingredients: Once the chocolate and butter are fully melted, stir in the sweetened condensed milk and vanilla extract until thoroughly combined. Ensure that no lumps remain and that the mixture is smooth and well-incorporated.
- Add the Oreos: Gently fold in the crushed Oreos until evenly distributed throughout the chocolate mixture. Avoid overmixing, as this can lead to a less creamy texture.
- Pour and Spread: Pour the Oreo mixture into the prepared baking pan and spread evenly using a spatula. Make sure the top is completely smooth for a professional look.
- Add the Topping: Sprinkle the reserved crushed Oreos over the top of the fudge. This adds a delightful textural contrast and visual appeal.
- Refrigerate: Refrigerate the fudge for at least 4 hours, or preferably overnight. This allows the fudge to set completely, resulting in a firmer, easier-to-cut consistency.
- Cut and Serve: Once the fudge is fully set, lift it out of the pan using the parchment paper overhang. Cut into squares and serve. Use a sharp knife for clean cuts and enjoy your delicious Oreo Fudge!
Tips and Variations for Your Oreo Fudge
Experimenting with different ingredients and techniques can elevate your Oreo Fudge to new heights. This section explores several variations and useful tips to help you avoid common mistakes and personalize this recipe to your taste.
- Chocolate Variations: Try using dark chocolate, milk chocolate, or even white chocolate chips instead of semi-sweet. You can also combine different types of chocolate for a unique flavor profile.
- Mix-ins: Add other ingredients to your Oreo Fudge for extra flavor and texture. Try chopped nuts, pretzels, peanut butter chips, or even sprinkles. Experiment and find your favorite combinations!
- Vegan Adaptation: Replace the butter with vegan butter and the sweetened condensed milk with a vegan alternative. Make sure to use vegan chocolate chips as well.
- Gluten-Free Option: Use gluten-free Oreo cookies to make this recipe suitable for those with gluten sensitivities.
- Preventing Cracks: Ensure the chocolate and butter are fully melted and combined before adding other ingredients. Don’t overmix the batter. Refrigerate the fudge for a sufficient amount of time.
- Storage: Store leftover Oreo Fudge in an airtight container in the refrigerator for up to a week.
Nutritional Information and Health Benefits of Oreo Fudge
While Oreo Fudge is undeniably indulgent, understanding its nutritional content and the benefits of its ingredients can help you enjoy it mindfully. This section provides approximate nutritional information (per serving, assuming 16 squares) and highlights the potential benefits of key ingredients.
Approximate Nutritional Information (per serving): These values are estimates and can vary depending on the specific ingredients used. Always check the nutritional information on the individual packaging of ingredients.
- Calories: Approximately 250-300
- Protein: Approximately 2-3 grams
- Fat: Approximately 15-18 grams
- Carbohydrates: Approximately 30-35 grams
Benefits of Ingredients:
- Dark Chocolate (if used): Rich in antioxidants, may improve heart health.
- Milk Chocolate (if used): Provides calcium and may boost mood (in moderation).
- Butter: Source of fat-soluble vitamins.
- Oreo Cookies: Provides some carbohydrates for energy.
Disclaimer: This nutritional information is approximate. For precise values, use a nutrition calculator with the specific brands and quantities of your ingredients.
FAQs
How long does Oreo Fudge last?
Can I freeze Oreo Fudge?
What kind of chocolate is best for Oreo Fudge?
Can I make this Oreo Fudge recipe ahead of time?
What are some creative variations for Oreo Fudge?
Conclusion
This Oreo Fudge recipe is a testament to the power of simple ingredients creating extraordinary flavors. Its ease of preparation, combined with the rich, satisfying taste, makes it a guaranteed crowd-pleaser. Whether you’re a seasoned baker or a beginner, this recipe is your path to dessert success. Don’t forget to share your creations with us in the comments below! Let us know your favorite variations or additions, and don’t hesitate to share this recipe with your friends and family. Happy baking, and enjoy the sweet taste of success with this irresistible Oreo Fudge! For more amazing recipes, visit our site at Recipes Liana! You can also find more sweet treat inspiration on our Pinterest board!
No-Bake Oreo Fudge
Ingredients
Equipment
Method
- Line an 8x8 inch baking pan with parchment paper, leaving an overhang on two sides to lift the fudge out later.
- Crush Oreo cookies finely. Set aside about 1/4 cup for topping.
- In a double boiler or microwave-safe bowl, melt butter and chocolate chips together. If using a microwave, melt in 30-second intervals, stirring until smooth and melted.
- Stir in sweetened condensed milk, vanilla extract, and salt (if using) until well combined.
- Add crushed Oreos to the chocolate mixture and stir until evenly distributed.
- Pour the mixture into the prepared baking pan and spread evenly. Sprinkle reserved crushed Oreos over the top.
- Refrigerate for at least 4 hours, or preferably overnight, to allow the fudge to set completely.
- Lift the fudge out of the pan using the parchment paper overhang. Cut into squares and serve.