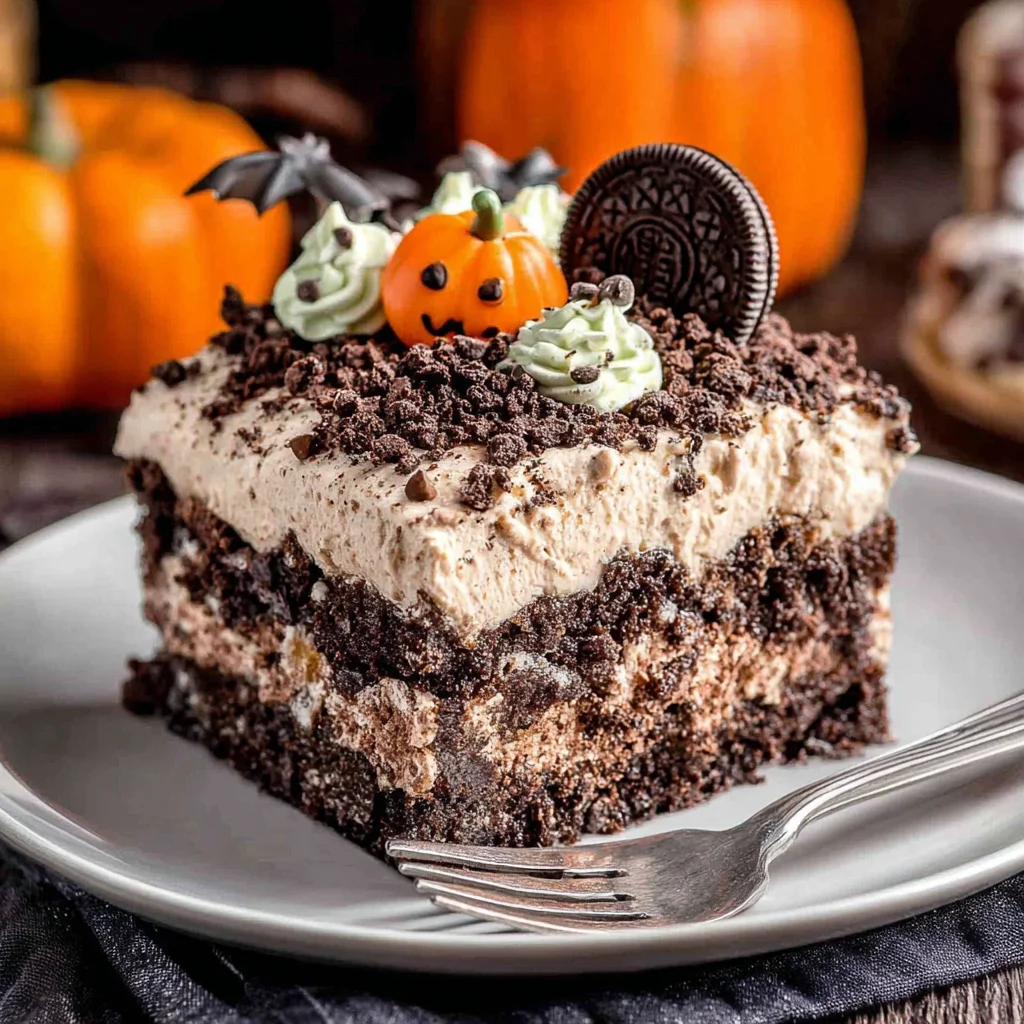
Get ready to dig into a graveyard of deliciousness with our hauntingly good Halloween Dirt Cake! This no-bake dessert is not only incredibly easy to make, but it’s also guaranteed to be a showstopper at your Halloween party. Imagine layers of rich chocolate pudding, representing fertile earth, topped with a crumbly, cocoa-dusted “dirt” made from crushed chocolate cookies. And the pièce de résistance? Wiggly gummy worms peeking out from the soil, adding a playful touch of fright to this delectable treat. Whether you’re a seasoned baker or a novice in the kitchen, this recipe is perfectly suited for you. It’s so simple, even the little goblins can help with the assembly! This Halloween Dirt Cake is more than just a dessert; it’s an experience, a conversation starter, and a guaranteed crowd-pleaser. Prepare for compliments and requests for the recipe it’s that good!
Why You’ll Love This Halloween Dirt Cake Recipe
This Halloween Dirt Cake recipe is a winner for so many reasons. Firstly, it’s incredibly easy to make, requiring minimal baking skills and only a few simple steps. No oven is needed, making it ideal for hot autumn days. Secondly, it’s incredibly versatile. Feel free to customize it to your liking by adding different candies, sprinkles, or even a spooky whipped cream topping. Thirdly, its presentation is undeniably impressive. This visually stunning dessert is guaranteed to wow your guests and create a memorable Halloween experience. The layers of “dirt” and pudding create a unique texture and visually appealing contrast, making it a perfect centerpiece for your Halloween spread. This spooky masterpiece requires minimal effort, offering maximum impact with minimal cleanup – a definite win for busy hosts! Finally, it’s a delicious combination of rich chocolate pudding and crunchy cookie “dirt,” pleasing both children and adults alike. It’s the perfect balance of sweet and slightly bitter, satisfying all those chocolate cravings.
Beyond its ease and visual appeal, this Halloween Dirt Cake is remarkably adaptable. Consider it a blank canvas for your creative Halloween flair. Imagine adding crushed Oreo cookies to mimic a grassy graveyard, or using different colored candies to create a truly unique and personalized dessert. This recipe opens the door for boundless creativity; let your imagination run wild! You can also easily scale this recipe up or down, perfect for intimate gatherings or large Halloween parties. There’s truly something for everyone in this deliciously spooky and versatile treat. Plus, who doesn’t love a dessert that’s both beautiful and easy?
Why You Should Try This Halloween Dirt Cake Recipe
This isn’t just any chocolate dessert; it’s a Halloween chocolate dessert, and that adds a whole new level of fun and excitement. The festive theme makes it perfect for parties, classroom treats, or simply a fun family dessert. Your guests will be delighted by the unique presentation and delicious taste. Beyond the fun factor, the recipe is impressively simple. You probably already have most of the ingredients in your pantry! This means less time spent shopping and more time spent enjoying the spooky festivities. The recipe is perfect for engaging the little ones in the kitchen too. Let them help crush the cookies or add the gummy worms; it’s a fun and educational activity! Plus, there’s no baking involved, making it a perfect recipe for beginner bakers or those looking for a quick and easy Halloween treat. This Halloween Dirt Cake is a delightful alternative to traditional baking, providing a no-fuss, crowd-pleasing dessert that will leave everyone satisfied.
Moreover, the recipe is surprisingly adaptable to dietary restrictions. With a few simple substitutions, you can easily make this dessert vegan, gluten-free, or cater to other preferences. The versatility ensures that everyone can enjoy this spooky delight. It’s a treat that truly brings people together. This Halloween Dirt Cake is more than just a dessert; it’s a memory-making experience for your family and friends. So, why not ditch the complicated recipes and embrace the simplicity and fun of this Halloween Dirt Cake? It’s a guaranteed success, a delicious treat, and a perfect way to celebrate the spooky season.
Ingredients and Necessary Utensils for Your Halloween Dirt Cake
This section details the ingredients and utensils you’ll need to create your spooktacular Halloween Dirt Cake. Accurate measurements ensure optimal results, so carefully follow the listed quantities. Proper tools streamline the preparation process, ensuring a smooth and efficient baking experience. Remember, precision in both ingredients and tools contributes significantly to a successful outcome.
Ingredients: A Detailed List
- For the “Dirt”:
- 1 package (18 ounces) chocolate sandwich cookies, finely crushed (about 4 cups): Choose your favorite brand! Oreos are a classic choice, but any chocolate sandwich cookie will work. Ensure they are finely crushed for a realistic dirt texture. Check out our no-bake recipes for inspiration on similar techniques.
- ½ cup unsweetened cocoa powder: This enhances the chocolate flavor and deepens the “dirt” color. Use a good quality cocoa powder for the best results.
- ½ cup milk: Any type of milk will work (dairy or non-dairy). The milk helps bind the “dirt” mixture.
- ¼ cup vegetable oil: This adds moisture and helps the “dirt” mixture hold its shape.
- For the “Worms”:
- 1 package (3 ounces) gummy worms: These are the stars of the show! Choose your favorite brand or flavor.
- For the “Pudding”:
- 1 (3.4 ounce) package instant chocolate pudding mix: This is the creamy heart of your Halloween Dirt Cake. Follow package directions for best results.
- 2 cups cold milk: Use cold milk for the best pudding consistency.
- For the “Grass” (Optional):
- 1 cup crushed green cookies (e.g., green-colored Oreos): This optional addition adds a fun, spooky touch to your dessert.
Recommended Utensils: Tools for Success
- Large bowl: For mixing the “dirt” mixture.
- Separate bowl: For preparing the chocolate pudding.
- Whisk: For smoothly blending the pudding mix and milk.
- Measuring cups and spoons: For accurate ingredient measurements.
- Food processor or zip-top bag: For crushing the cookies (a food processor is faster, but a bag and rolling pin also work well).
- Individual serving glasses or trifle bowl: To layer your Halloween Dirt Cake. The size and shape depend on your preference.
- Refrigerator: To chill the cake and allow the pudding to set.
- Spatula or spoon: For layering and spreading the pudding and “dirt” mixtures.
- (Optional) Small sieve or strainer: If using crushed green cookies for the “grass,” it can help create a finer texture and prevent larger cookie pieces.
Detailed Recipe Steps: Creating Your Halloween Dirt Cake
Follow these step-by-step instructions to create a deliciously spooky Halloween Dirt Cake. Each step contains essential tips and tricks to ensure the best results and enhance your baking journey. Remember, attention to detail guarantees a perfectly delightful treat.
Step 1: Preparing the “Dirt”
- Crush the cookies: Place your chocolate sandwich cookies into a food processor and pulse until finely crushed. Alternatively, place the cookies in a zip-top bag and crush them using a rolling pin. Aim for a consistently crumbly texture, avoiding large chunks.
- Combine ingredients: In a large bowl, combine the crushed cookies, cocoa powder, milk, and vegetable oil. Mix thoroughly until a moist, crumbly mixture forms. The consistency should resemble moist soil. If it’s too dry, add a little more milk; if it’s too wet, add more crushed cookies.
- Set aside: Once your “dirt” is ready, set it aside while you prepare the pudding.
Step 2: Preparing the Chocolate Pudding
- Whisk the pudding: In a separate bowl, whisk together the instant chocolate pudding mix and cold milk for 2 minutes. This ensures a smooth and lump-free pudding. Whisk vigorously to prevent clumping.
- Let it set: Allow the pudding to stand for 5 minutes to slightly thicken. This allows the pudding to set slightly, creating a more stable base for your layers.
Step 3: Assembling the Halloween Dirt Cake
- Layer the ingredients: In individual serving glasses or a trifle bowl, begin layering. Start with a layer of the chocolate pudding. Then, add a layer of the “dirt” mixture. Repeat the layers, ending with a layer of “dirt.” The number of layers depends on the size of your serving vessels.
- Press gently: Gently press down on each layer to create a compact and even surface. This prevents the layers from separating and ensures an aesthetically pleasing final product. Avoid over-packing, which could make the cake too dense.
Step 4: Adding the Worms and Grass (Optional)
- Insert the worms: Gently press the gummy worms into the top layer of “dirt,” mimicking worms in the soil. This is a fun, interactive step, especially for children. Arrange the worms creatively for a more whimsical presentation.
- Sprinkle the grass (Optional): If using, sprinkle the crushed green cookies around the edges of the glasses or bowl to simulate grass. This adds a visual pop and enhances the Halloween theme.
Step 5: Chilling and Serving
- Refrigerate: Refrigerate the Halloween Dirt Cake for at least 30 minutes to allow the pudding to set completely and the flavors to meld. This chilling step ensures a firmer, more stable dessert.
- Serve and Enjoy!: Once chilled, serve immediately and enjoy your delicious Halloween Dirt Cake!
Tips and Variations for Your Halloween Dirt Cake
This section offers valuable tips to avoid common mistakes and provides exciting variations to personalize your Halloween Dirt Cake. Mastering these techniques and embracing alternative ingredients unlocks a world of creative possibilities.
Avoiding Common Mistakes
- Don’t over-crush the cookies: Avoid creating cookie dust. Aim for a coarse crumbly texture for the best “dirt” effect.
- Ensure proper pudding consistency: Follow the pudding mix instructions carefully for the optimal creamy texture. Don’t add too much or too little milk.
- Layer evenly: For a visually appealing dessert, make sure you layer the pudding and dirt evenly in each serving. Using a spoon or spatula helps with even layering.
- Chill sufficiently: Allow enough time for the pudding to set properly before serving. This prevents a runny or messy dessert.
Ingredient Alternatives and Variations
- Vegan Option: Use vegan chocolate sandwich cookies, vegan chocolate pudding mix, and a non-dairy milk alternative.
- Gluten-Free Option: Use gluten-free chocolate sandwich cookies and ensure the pudding mix is gluten-free.
- Add-ins: Experiment with other candies, such as chocolate chips, sprinkles, or mini chocolate candies, to add extra flavor and visual appeal. Try incorporating some of your favorite no-bake treats for extra flavour.
- Different “Dirt”: Try using different types of crushed cookies, such as graham crackers or chocolate wafers, for a unique texture and flavor.
- Whipped Cream Topping: Add a layer of whipped cream on top of the “dirt” for extra richness and sweetness. You can even add some spooky sprinkles or chocolate shavings!
Nutritional Values and Health Benefits of Halloween Dirt Cake
While this Halloween Dirt Cake is a decadent treat, let’s explore its nutritional aspects. Understanding the nutritional content and benefits of each ingredient allows for mindful enjoyment and informed choices. Remember, moderation is key when enjoying delicious desserts.
Note: The nutritional information below is an approximation and may vary depending on the specific brands and quantities of ingredients used. For precise nutritional data, utilize a nutrition calculator with the specific ingredients you used.
Approximate Nutritional Information (per serving, assuming 6 servings):
- Calories: Approximately 300-350
- Protein: Approximately 4-5 grams
- Fat: Approximately 15-18 grams
- Carbohydrates: Approximately 40-45 grams
Benefits of Ingredients:
- Chocolate: Contains antioxidants (flavonoids) that may offer some health benefits, though this is heavily dependent on the type of chocolate and processing.
- Milk: A good source of calcium and vitamin D (depending on the type of milk).
- Cookies: Provide carbohydrates for energy. However, this is highly dependent on the ingredients used in the cookies.
Remember that this is a dessert to be enjoyed occasionally as part of a balanced diet. Focusing on whole, unprocessed foods for the majority of your meals is crucial for overall health and well-being.
FAQs
Can I make this Halloween Dirt Cake ahead of time?
What can I substitute for gummy worms?
Is this Halloween Dirt Cake recipe gluten-free?
How long does the Halloween Dirt Cake last in the refrigerator?
Can I use different types of cookies for the “dirt”?
How can I make this Halloween Dirt Cake even spookier?
Conclusion: Spooky Deliciousness Awaits!
This Halloween Dirt Cake recipe offers a simple yet impressive dessert perfect for any Halloween gathering. Its ease of preparation, customizable options, and undeniably spooky presentation make it a winner. From its rich chocolate pudding base to its crumbly “dirt” topping and wiggly gummy worms, every bite is a delightful surprise. Remember to adjust the recipe to your preference, explore different variations, and most importantly, have fun creating this spooky masterpiece!
We’d love to hear your experience making this Halloween Dirt Cake. Share your photos and comments below! Don’t forget to share this recipe with your friends and family so they too can enjoy this delectable treat. Happy Halloween and happy baking! Check out more spooky recipes and ideas on our blog and follow us on Pinterest for more culinary inspiration.
Spooky Halloween Dirt Cake
Ingredients
Equipment
Method
- Crush chocolate sandwich cookies into fine crumbs using a food processor or by placing them in a zip-top bag and crushing with a rolling pin.
- In a large bowl, combine crushed cookies, cocoa powder, milk, and vegetable oil. Mix until a moist, crumbly mixture forms.
- In a separate bowl, whisk together chocolate pudding mix and cold milk for 2 minutes until smooth and creamy. Let stand for 5 minutes to thicken slightly.
- Layer pudding and “dirt” mixture in individual serving glasses or a trifle bowl, starting and ending with a layer of dirt.
- Press gummy worms into the top layer of dirt.
- Sprinkle crushed green cookies around the edges (optional).
- Refrigerate for at least 30 minutes before serving to allow the pudding to set.