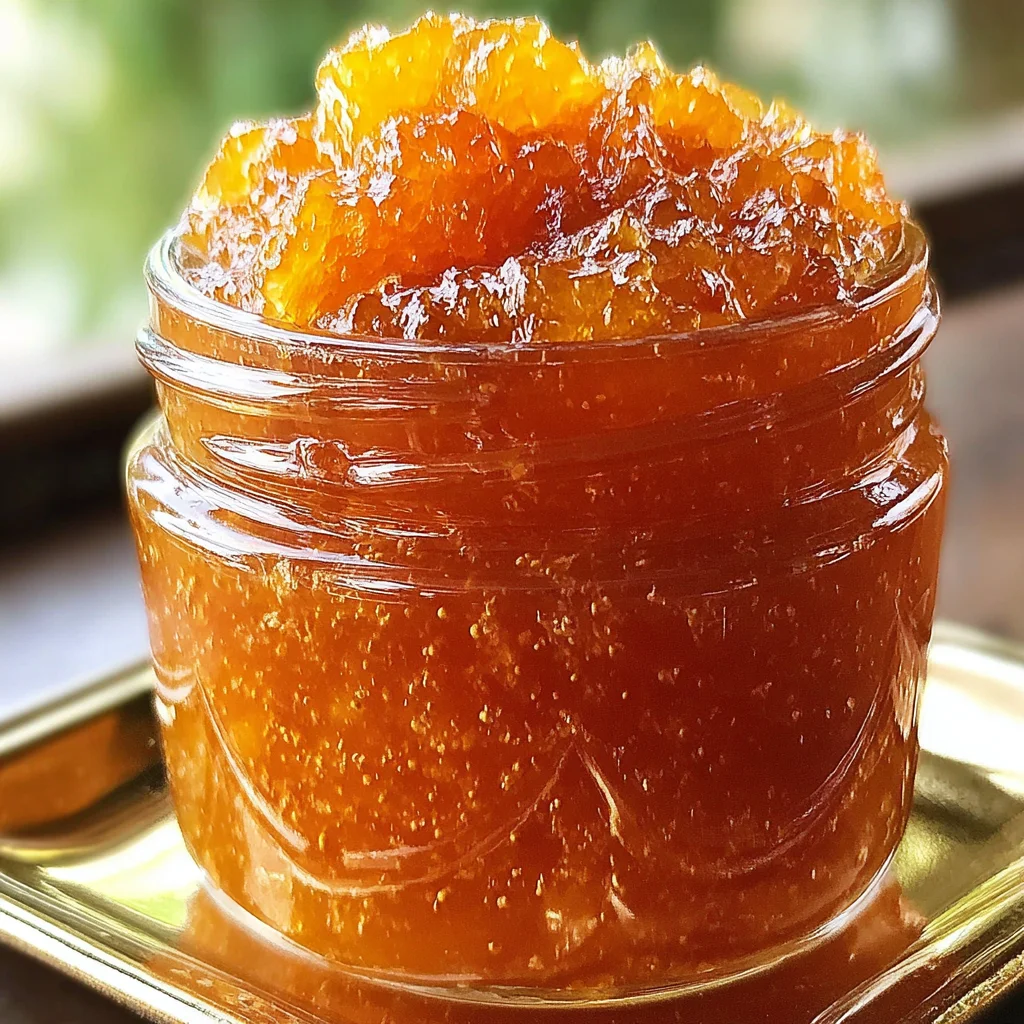
Summer’s bounty is at its peak, and what better way to capture its sweetness than with a batch of homemade peach jam? This Quick Peach Jam Recipe is designed for the busy home cook, delivering incredible flavor without lengthy cooking times. Forget those complicated, all-day canning projects. This recipe harnesses the power of liquid pectin to achieve a perfect, set jam in just minutes. Imagine the vibrant color, the luscious texture, and the burst of fresh peach flavor all ready to spread on toast, biscuits, or even enjoy by the spoonful! Get ready to transform those juicy, sun-ripened peaches into a delectable treat that will impress your family and friends. Whether you’re a seasoned jam-maker or a complete beginner, this recipe will guide you every step of the way, ensuring a successful and delicious outcome. Prepare to be amazed by how easy and rewarding making your own peach jam can be!
Why You’ll Love This Quick Peach Jam Recipe
This Quick Peach Jam Recipe isn’t just about speed; it’s about unparalleled flavor and convenience. Let’s dive into the reasons why you’ll absolutely adore this recipe:
- Unbeatable Speed: This recipe prioritizes efficiency without compromising quality. From start to finish, you’ll have delicious jam in under an hour perfect for busy schedules!
- Fresh Peach Flavor Explosion: Using ripe, in-season peaches guarantees a burst of fresh, summery flavor in every spoonful. You’ll taste the difference between homemade and store-bought!
- Simple Ingredients: This recipe uses readily available ingredients, making it easy to whip up on a whim. No need for specialized or hard-to-find items!
- Minimal Equipment Required: You’ll only need a few basic kitchen tools, making this recipe incredibly accessible to everyone.
- Perfect Texture Every Time: Liquid pectin ensures a consistent, perfectly set jam with that satisfying jiggle. No more worries about runny or gummy results!
- Versatile Use: Enjoy your homemade peach jam on toast, biscuits, scones, pancakes, waffles, or even use it as a delicious glaze for desserts. The possibilities are endless!
- A Taste of Summer: Capture the essence of summer’s sweetness and preserve it for months to come. Enjoy the taste of sunshine whenever you want, even during the colder months!
- Cost-Effective: Making your own jam is often more economical than buying it from the store, especially when using seasonal fruits. Plus, you get to control the sweetness and ingredients!
- Impress Your Loved Ones: Homemade gifts are always appreciated! A jar of this delicious peach jam makes a thoughtful and delicious present for family and friends.
- Perfect for Beginners: This recipe is incredibly user-friendly and provides clear, step-by-step instructions, making it ideal for beginners in the world of jam-making.
Why You Should Try This Quick Peach Jam Recipe
Beyond the deliciousness, there are several compelling reasons to add this Quick Peach Jam Recipe to your repertoire:
- Control over Ingredients: You decide the sweetness level and the quality of the ingredients used. No artificial flavors, preservatives, or added sugars.
- Healthier Option: Compared to commercially produced jams, homemade options often contain less sugar and fewer additives. This recipe allows you to prioritize your health.
- A Rewarding Experience: The process of making your own jam is incredibly satisfying, connecting you more deeply with your food and its origin.
- Unique Gift Idea: Share the joy of your homemade jam with friends and family. A personalized jar of peach jam makes a thoughtful and unique gift.
- Cost Savings in the Long Run: While you’ll initially spend money on ingredients, making your own jam will save you money over the long term, especially considering the convenience of having it on hand.
- Supports Local Farmers: Sourcing your peaches from local farmers markets supports local economies and ensures the freshest, most flavorful ingredients.
- Sustainable Choice: By making your own jam, you reduce reliance on mass-produced foods and their associated environmental impact. Enjoy a more sustainable way of enjoying your favorite summer fruit.
- Great for All Skill Levels: This recipe is simple enough for beginners, but interesting and adaptable enough for experienced jam makers to explore different variations.
- Improves Your Culinary Skills: Making your own jam expands your culinary skills and allows you to experiment with different flavors and techniques.
- Endless Possibilities for Flavor Combinations: This recipe is a base. You can easily experiment with adding spices like cinnamon or cardamom or other fruits like berries to create your own signature peach jam.
Ingredients and Necessary Utensils for Your Quick Peach Jam Recipe
Gathering the right ingredients and tools will ensure a smooth and successful jam-making experience. Let’s get started!
Ingredients for the Quick Peach Jam
- 4 cups peeled and sliced ripe peaches (about 2 pounds): Choose peaches that are ripe but firm, not overly soft or bruised. The flavor of your jam will depend heavily on the quality of your peaches. Consider using a variety known for its sweetness and intense flavor. For the best results, buy your peaches locally and in season!
- 3 cups granulated sugar: Granulated sugar is the most common type of sugar used in jam making. For a less sweet jam, reduce the sugar to 2 1/2 cups, but note that it might affect the setting of the jam.
- 1/4 cup lemon juice: Freshly squeezed lemon juice is best, but bottled works in a pinch. Lemon juice adds acidity, which helps to balance the sweetness and also acts as a natural preservative.
- 1 (1-ounce) package liquid pectin: Liquid pectin is a crucial ingredient that helps the jam set properly. Make sure you get the liquid form specifically, and follow the package instructions, as different pectins may have varying ratios.
Utensils You’ll Need
- Large, heavy-bottomed saucepan: A heavy-bottomed saucepan helps to distribute heat evenly, preventing scorching and ensuring consistent cooking. Stainless steel or enamel-coated pots are ideal. This is especially important when working with a high-heat method, such as this quick jam recipe.
- Wooden spoon or spatula: Use a heat-resistant wooden spoon or spatula to stir the jam constantly during the boiling process. This prevents sticking and ensures that the jam cooks evenly. Avoid using metal utensils, as they can scratch your pot and potentially react with the ingredients.
- Measuring cups and spoons: Accurate measurements are key in jam-making, so invest in reliable measuring cups and spoons. This ensures that the final product has the right consistency and setting. Avoid using nested measuring cups when measuring out liquid ingredients.
- Potato masher (optional): If you prefer a smoother jam, you can use a potato masher to gently crush some of the peach slices after the initial boiling. This step is completely optional, however, and if you prefer a slightly chunkier consistency, you can skip this step entirely.
- Sterilized half-pint jars and lids: Use clean, sterilized jars to prevent spoilage. You can sterilize your jars by washing them in hot soapy water, then boiling them in water for 10 minutes.
- Jar lifter (optional): A jar lifter makes transferring hot jars from the boiling water bath much easier and safer.
- Large bowl for ice bath (for peeling peaches): An ice bath is an excellent method for stopping the cooking process when blanching peaches.
- Vegetable peeler or paring knife: For peeling the peaches before slicing. A sharp paring knife or a vegetable peeler will do the trick.
- Colander or strainer: For draining the blanched peaches. Helps avoid any excess water in the finished product.
- Ladle: For transferring the hot jam into the jars. A ladle allows for a more controlled pour and helps prevent spills.
- Canning pot and rack (optional): If you choose to water bath can your jam for longer shelf life.
Detailed Steps for Your Quick Peach Jam Recipe
Now that you have all your ingredients and tools ready, let’s dive into the recipe itself!
Step 1: Prepare the Peaches
Washing, peeling, and slicing the peaches is the first crucial step. Start by thoroughly washing the peaches under cold running water. To easily peel the peaches, score an “X” on the bottom of each peach. Then, blanch them in boiling water for about 30 seconds. Immediately transfer the peaches to an ice bath to stop the cooking process. The skins should now slip right off. Slice the peaches into approximately 1/2-inch thick pieces. Ensure that your peaches are completely dry before proceeding. Excess moisture can affect the jam’s setting.
Step 2: Combine Ingredients
In your large, heavy-bottomed saucepan, combine the prepared peach slices, granulated sugar, and lemon juice. Stir well to ensure that the sugar and lemon juice are evenly distributed throughout the peaches. Take your time during this step to ensure the sugar is fully incorporated into the fruit. This will help it dissolve quickly later on during the cooking process.
Step 3: Add Pectin and Bring to a Boil
Stir in the liquid pectin. Make sure to add the pectin carefully while stirring gently to avoid clumps forming. Bring the mixture to a full rolling boil over high heat, stirring constantly. A full rolling boil is a boil that cannot be stirred down it’s a vigorous boil that produces large, continuous bubbles.
Step 4: Boil for One Minute
Once you’ve reached a full rolling boil, continue boiling hard for exactly one minute, stirring constantly. This is a crucial step for achieving the proper set. Do not reduce the heat or stop stirring. Consistent stirring prevents scorching on the bottom of the pan.
Step 5: Remove from Heat and Skim Foam
Remove the saucepan from the heat immediately after the one-minute boil. Skim off any foam that may have formed on the surface of the jam using a clean spoon. Removing the foam enhances the visual appeal and texture of the final product. This is an important step to ensure a smooth finish.
Step 6: Ladle into Jars
Carefully ladle the hot jam into your sterilized half-pint jars, leaving 1/4-inch headspace at the top of each jar. Leave the recommended headspace to allow for expansion during cooling and prevent spills or overflows. Wipe the rims of the jars clean with a damp cloth to ensure a good seal.
Step 7: Seal the Jars
Place the lids and rings on the jars and tighten fingertip tight. Do not overtighten the rings, as this can prevent proper sealing. Fingertip tight is sufficient.
Step 8: Process (Optional)
For longer shelf life (up to a year), process the jars in a boiling water bath for 10 minutes. Always adjust processing times according to your altitude – consult a reliable canning guide for accurate times. If you skip this step, store the jam in the refrigerator and use it within 2-3 weeks. This step is completely optional but greatly increases the shelf-life of your delicious peach jam.
Step 9: Cool and Check Seals
Let the jars cool completely. You should hear a “pop” sound as the jars seal. Press down on the center of each lid; if it doesn’t flex, the jar is sealed. Store sealed jars in a cool, dark, and dry place. Proper cooling and sealing are essential to preserve the quality of your quick peach jam.
Tips and Variations for Your Quick Peach Jam Recipe
Here are some helpful tips and variations to make your quick peach jam even better:
- Adjust Sweetness: Reduce the sugar by 1/2 cup for a less sweet jam, or add a touch more for extra sweetness.
- Spice it Up: Add a dash of cinnamon, cardamom, or nutmeg for a warm, spiced peach jam. A pinch of ginger can add a unique flavor dimension.
- Add Other Fruits: Combine peaches with other fruits like blueberries, raspberries, or strawberries for a more complex flavor profile.
- Use Different Types of Peaches: Experiment with different peach varieties to discover your favorite flavor combinations. The sweetness and acidity vary between varieties.
- Avoid Overripe Peaches: Use ripe but firm peaches for the best results. Overripe peaches can lead to a runny jam.
- Don’t Skip the Lemon Juice: Lemon juice is essential for both flavor and preservation. Don’t omit it!
- Sterilize Your Jars Properly: Proper sterilization prevents mold and spoilage. It’s a crucial step to maintain the quality of your jam.
- Check for a Proper Seal: Make sure your jars are properly sealed to prevent spoilage. Listen for the ‘pop’ sound.
- Make it Vegan: This recipe is naturally vegan as it doesn’t contain any animal products.
- Make it Gluten-Free: This recipe is naturally gluten-free.
Nutritional Values and Benefits of Quick Peach Jam
While jam is a treat best enjoyed in moderation, it does offer some nutritional benefits. A single serving (approximately 1 tablespoon) of this Quick Peach Jam Recipe will vary in nutritional content slightly depending on the specific peaches used, but generally provides:
- Moderate source of Vitamin C: Peaches are a good source of Vitamin C, an antioxidant crucial for immune function.
- Dietary Fiber: Though some fiber is lost during the cooking process, peaches still contribute some fiber to the jam, promoting digestive health.
- Antioxidants: Peaches contain various antioxidants that combat free radicals in the body, potentially reducing the risk of chronic diseases.
- Potassium: Peaches contribute a small amount of potassium, an essential mineral for maintaining healthy blood pressure.
Note: The nutritional values of this jam are significantly influenced by the amount of sugar used. Reducing sugar will lower the overall calorie and carbohydrate content, but it may affect the jam’s consistency. This recipe provides an approximate nutritional profile; for precise values, use a nutrition calculator and input your specific ingredients and quantities.
FAQs
How long does this quick peach jam last?
Can I use frozen peaches for this Quick Peach Jam Recipe?
What happens if my quick peach jam doesn’t set?
Can I adjust the sweetness of this Quick Peach Jam Recipe?
Is this Quick Peach Jam Recipe suitable for canning beginners?
Conclusion
This Quick Peach Jam Recipe is a testament to the fact that homemade doesn’t have to mean hours in the kitchen. With its speed, simplicity, and delicious results, it’s a perfect recipe for busy cooks who want to savor the taste of summer’s bounty. The vibrant flavor and perfect texture of this jam make it an ideal addition to your breakfast table or a thoughtful gift for friends and family. So, grab those ripe peaches, gather your ingredients, and get ready to embark on a delightful jam-making adventure. Remember to share your creations with us and let us know what you think in the comments section below! Don’t forget to check out other delicious recipes on our blog, such as our Mini Pumpkin Pie Crescent Rolls for a sweet fall treat, or our Easy Pumpkin Fudge for a simple dessert!
And for more delicious inspiration, follow us on Pinterest! Check out our Pinterest page for more great recipes!
Quick Peach Jam
Ingredients
Equipment
Method
- Wash, peel, and slice the peaches. Blanching in boiling water for 30 seconds, then ice water, makes peeling easier. Slice into 1/2-inch pieces.
- In a large saucepan, combine peaches, sugar, and lemon juice. Stir well.
- Stir in the liquid pectin. Bring to a full rolling boil over high heat, stirring constantly.
- Boil hard for exactly 1 minute, stirring constantly.
- Remove from heat; skim off any foam. Ladle hot jam into sterilized half-pint jars, leaving 1/4-inch headspace.
- Wipe jar rims clean. Place lids and rings on jars; tighten fingertip tight. Process in a boiling water bath for 10 minutes (adjust for altitude).
- Cool completely. Check seals. Store sealed jars in a cool, dark, dry place. Refrigerate unprocessed jam and use within 2-3 weeks.