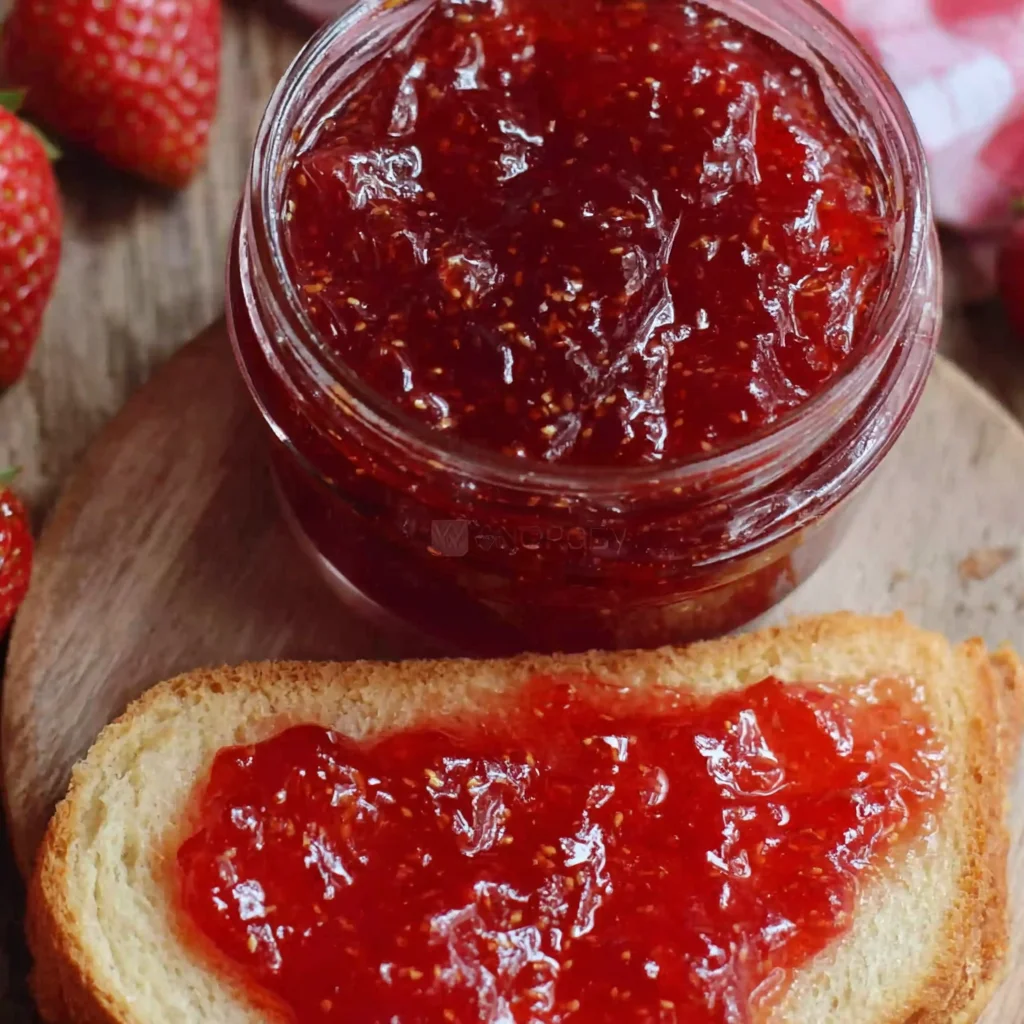
Summer’s bounty is at its peak, and what better way to capture its sweetness than by making your own homemade strawberry jam? This Homemade Strawberry Jam Recipe is a delightful journey into the world of preserving summer’s vibrant flavors. Forget those overly sugary, commercially produced jams; this recipe delivers a truly authentic taste experience. From the first juicy bite, you’ll be transported to sun-drenched strawberry patches, savoring the pure, unadulterated taste of fresh, ripe strawberries. The process is surprisingly simple, and the reward – a jar of homemade goodness – is invaluable. This Homemade Strawberry Jam Recipe is perfect for slathering on toast, pairing with creamy cheeses, or using as a vibrant filling for pastries. Get ready to experience the magic of creating something truly special from scratch.
This recipe is more than just instructions; it’s a celebration of seasonal fruits and the satisfaction of making something delicious with your own two hands. We’ll guide you through each step, offering tips and tricks to ensure a perfect, set jam every single time. So, gather your ingredients, put on your apron, and let’s embark on this delicious adventure together. Prepare to be amazed by the vibrant color, the intense aroma, and the incredibly satisfying taste of your homemade strawberry jam.
Why You’ll Love This Homemade Strawberry Jam Recipe
There’s something undeniably magical about making your own jam. It’s a connection to simpler times, a chance to appreciate the bounty of nature, and a deeply satisfying way to preserve summer’s flavors. This Homemade Strawberry Jam Recipe offers more than just a delicious result; it offers an experience. Here’s why you’ll adore this recipe:
- Unmatched Flavor: The taste of this homemade jam is far superior to anything you can buy in a store. The intense strawberry flavor shines through, unmasked by artificial sweeteners or preservatives.
- Control Over Ingredients: You decide exactly what goes into your jam. Use only the highest quality strawberries and adjust the sweetness level to your liking. This ensures a healthier, more flavorful final product. No more worrying about hidden ingredients or excessive sugar.
- A Rewarding Process: Making jam is a wonderfully therapeutic experience. The process is surprisingly straightforward, yet incredibly fulfilling. It’s a great way to spend a relaxing afternoon, connect with nature’s bounty, and create something truly special.
- Perfect for Gifting: Homemade jam makes a thoughtful and unique gift. Fill pretty jars with your delicious creation and share the joy of homemade goodness with friends and family. It’s a gift that keeps on giving, delivering flavor and heartwarming sentiment.
- Versatility: This strawberry jam is incredibly versatile. Spread it on toast, use it as a filling for pastries, pair it with yogurt and granola, or use it as a topping for ice cream. The possibilities are endless.
- Cost-Effective: While the initial investment in jars and other supplies might seem significant, you’ll find that making your own jam is often more cost-effective in the long run, especially when using seasonal, inexpensive strawberries.
Why You Should Try This Homemade Strawberry Jam Recipe
In a world of convenience and processed foods, taking the time to make something from scratch is a precious act. This Homemade Strawberry Jam Recipe is more than just a recipe; it’s an opportunity to reconnect with the simple pleasures of cooking and savoring real food. Here’s why you should give it a try:
- Fresh, High-Quality Ingredients: You’ll be using fresh, ripe strawberries as the star of the show. This ensures the jam’s unparalleled flavor and vibrant color.
- Simple Steps, Delicious Results: The recipe is surprisingly easy to follow, even for beginner cooks. Don’t let the thought of canning intimidate you; it’s a straightforward process that will leave you feeling accomplished.
- A Taste of Summer All Year Round: Preserve the taste of summer and enjoy this delicious jam throughout the year. It’s a perfect reminder of warm, sunny days, even when the weather turns cold.
- Great for Beginners: This recipe is designed with beginner cooks in mind. We provide clear instructions, helpful tips, and troubleshooting advice to ensure a successful outcome.
- A Delicious and Healthy Treat: Made with fresh strawberries and minimal added sugar, this jam is a healthier alternative to store-bought options. Enjoy it guilt-free as part of a balanced diet.
- A Unique Culinary Skill: Learning to make jam is a valuable skill that will impress friends and family. It’s a tradition passed down through generations, and now you can be a part of it.
Ingredients and Necessary Utensils for Your Homemade Strawberry Jam Recipe
Before you embark on this delightful culinary journey, let’s gather the necessary ingredients and equipment. Having everything ready beforehand makes the process smoother and more enjoyable.
Ingredients:
- 4 cups (1 pound) ripe strawberries: Choose strawberries that are ripe but firm. Avoid those that are overripe or damaged, as they will result in a less flavorful jam.
- 3 cups granulated sugar: The amount of sugar can be adjusted based on your preference. For a less sweet jam, reduce the sugar by 1/2 cup.
- 1/4 cup lemon juice (about 1 large lemon): Lemon juice adds acidity, which helps to balance the sweetness and helps the jam to set properly. Freshly squeezed lemon juice is preferred.
- 1 (1-inch) piece lemon zest (optional, but adds brightness): Lemon zest enhances the aroma and provides a subtle citrusy note to the jam.
- 1/4 teaspoon butter (optional, helps reduce foaming): A tiny bit of butter helps to reduce foaming during the cooking process, resulting in a smoother jam.
Necessary Utensils:
- Large, heavy-bottomed saucepan: A heavy-bottomed saucepan is crucial for even heating and preventing scorching.
- Wooden spoon or spatula: Use a wooden spoon or spatula for stirring the jam. Avoid using metal utensils, as they can react with the fruit and affect the flavor.
- Measuring cups and spoons: Accurate measurements are vital for a successful jam-making process.
- Fine-mesh sieve (optional): If you prefer a smoother jam, use a fine-mesh sieve to remove any seeds or pulp after cooking. This step is optional, and many people enjoy the texture of the seeds in their jam.
- Sterilized jars and lids: Choose jars with a capacity suitable for the amount of jam you’re making. Proper sterilization is essential for preserving the jam.
- Jar lifter (optional): A jar lifter makes handling hot jars during the canning process much easier and safer.
- Large pot and rack (for water bath canning – optional): If you choose to water bath can your jam, you’ll need a large pot and a canning rack.
- Jam thermometer (optional): A jam thermometer is helpful for determining when the jam has reached the proper setting point.
- Chilled plate: Used for the “wrinkle test” to determine if the jam has reached its setting point.
Detailed Steps for Your Homemade Strawberry Jam Recipe
Now, let’s get cooking! Follow these detailed steps to create your own delicious Homemade Strawberry Jam:
- Prepare the Strawberries: Wash the strawberries thoroughly under cold running water. Remove the green hulls and slice the strawberries into roughly 1/2-inch pieces. If using lemon zest, zest the lemon before juicing to avoid getting any bitter white pith into your zest.
- Combine Ingredients: In your large, heavy-bottomed saucepan, combine the sliced strawberries, granulated sugar, lemon juice, lemon zest (if using), and butter (if using). Gently stir to combine all ingredients. **Make sure to thoroughly mix the sugar into the strawberries to help draw out their juices.**
- Cook the Jam: Bring the mixture to a rolling boil over medium-high heat, stirring frequently to prevent sticking. **Continuous stirring during this initial stage is crucial to prevent burning**. Once boiling, reduce the heat to medium-low and continue stirring occasionally. The mixture will begin to thicken.
- Reach the Setting Point: Cook the jam for 10-15 minutes, or until it reaches the setting point. **The setting point is crucial for ensuring your jam will set properly.** The setting point is reached when a small amount of jam placed on a chilled plate wrinkles slightly when pushed with a finger (the wrinkle test). Alternatively, use a jam thermometer; the jam should reach 220°F (104°C).
- Fill the Jars: While the jam is still hot, carefully ladle it into your sterilized jars, leaving about 1/4 inch of headspace at the top. **Headspace is important to allow for expansion during cooling and to prevent seal failure.** Wipe the rims of the jars clean with a damp cloth to ensure a good seal. Then, place the lids and rings on the jars.
- Process the Jars (Optional): For longer shelf life (up to a year), process the filled jars in a boiling water bath for 10 minutes. This step is optional if you plan to consume the jam within a few weeks and store it in the refrigerator. If not processing, allow the jars to cool completely. You should hear a “pop” sound as the jars seal. **If you hear no “pop”, refrigerate the jar and consume it within a few weeks.**
- Cool and Store: Let the jars cool completely. Check the seals to ensure they are properly sealed (the lids should not flex). Store sealed jars in a cool, dark place. Unsealed jars should be refrigerated and consumed within a few weeks.
Tips and Variations for Your Homemade Strawberry Jam Recipe
This Homemade Strawberry Jam Recipe is a fantastic base, but feel free to experiment and personalize it to your liking! Here are some helpful tips and variations:
- Adjust the Sweetness: Adjust the amount of sugar to your taste. Reduce it for a less sweet jam, or increase it for a sweeter one. Keep in mind that less sugar may result in a jam with a shorter shelf life.
- Add Spices: Experiment with adding a pinch of cinnamon, cardamom, or even a few drops of vanilla extract for a unique flavor profile.
- Use Different Citrus Fruits: Instead of lemon, try lime or orange juice and zest for a different flavor dimension.
- Make a Seedless Jam: If you don’t like strawberry seeds, you can use a fine-mesh sieve to remove them after the jam has cooked. This step will result in a smoother jam with a slightly different texture.
- Add Other Fruits: Combine strawberries with other fruits like raspberries, blueberries, or blackberries for a mixed berry jam.
- Make a Low-Sugar Jam: Use a sugar substitute such as stevia or erythritol to make a lower sugar jam. However, bear in mind that the setting point may differ.
- Avoid Common Mistakes: Ensure your strawberries are ripe but firm. Don’t overcook the jam, as this can lead to a burnt or gummy texture. Sterilize your jars properly to prevent spoilage. And always use a heavy-bottomed pan to prevent burning.
Nutritional Values and Benefits of Your Homemade Strawberry Jam Recipe
This Homemade Strawberry Jam Recipe, while delicious, also offers several nutritional benefits:
While exact nutritional values vary based on the specific strawberries used and the amount of sugar added, a general estimate per serving (approximately 1 tablespoon) would be:
- Calories: Approximately 40-60 calories
- Protein: Negligible
- Fat: Negligible
- Carbohydrates: Approximately 10-15 grams
Benefits of Strawberries: Strawberries are rich in Vitamin C, an antioxidant that supports the immune system. They are also a good source of manganese, which plays a role in bone health and metabolism. Furthermore, strawberries contain various antioxidants and fiber, contributing to overall health.
Benefits of Lemon: Lemon juice contributes Vitamin C and antioxidants to the jam, boosting its nutritional profile and adding a pleasant tang. The pectin in the strawberries combines with the lemon juice to help the jam set and thicken. Remember, excessive sugar can have negative health effects; reducing the amount of sugar added to this recipe enhances its nutritional profile.
FAQs
How long does homemade strawberry jam last?
Can I use frozen strawberries to make jam?
What is the best way to sterilize jars for homemade jam?
How do I know if my homemade strawberry jam has set properly?
What should I do if my homemade strawberry jam is too runny?
Conclusion
Making your own Homemade Strawberry Jam is a rewarding experience that connects you to the simple pleasures of cooking and the bounty of nature. This recipe, with its detailed instructions and helpful tips, guides you through each step, ensuring delicious results. From the intense strawberry flavor to the beautiful vibrant color, this homemade jam is a true testament to the art of preserving summer’s sweetness. Now, it’s your turn! Try out this Homemade Strawberry Jam Recipe and share your delicious creations with friends and family. Don’t forget to leave a comment below and let us know how it turned out! And for more delightful dessert recipes, check out our Mini Pumpkin Pie Crescent Rolls or Easy Pumpkin Fudge recipes. Happy Jamming!
Share your homemade strawberry jam creations with us on Pinterest! We’d love to see your photos.
Homemade Strawberry Jam: A Deliciously Easy Recipe
Ingredients
Equipment
Method
- Wash and hull the strawberries. Slice them into roughly 1/2-inch pieces. Zest the lemon (if using) before juicing.
- In a large saucepan, combine strawberries, sugar, lemon juice, lemon zest (if using), and butter (if using). Stir gently to combine.
- Bring the mixture to a boil over medium-high heat, stirring frequently to prevent sticking.
- Reduce heat to medium-low, and continue stirring occasionally. If using pectin, add it according to package directions.
- Cook for 10-15 minutes, or until the jam reaches setting point (see notes for testing).
- Ladle the hot jam into sterilized jars, leaving 1/4 inch headspace. Wipe rims clean, seal with lids and rings.
- Process in a boiling water bath for 10 minutes (optional, for longer shelf life). Cool completely; check seals.
- Store sealed jars in a cool, dark place. Refrigerate unsealed jars.