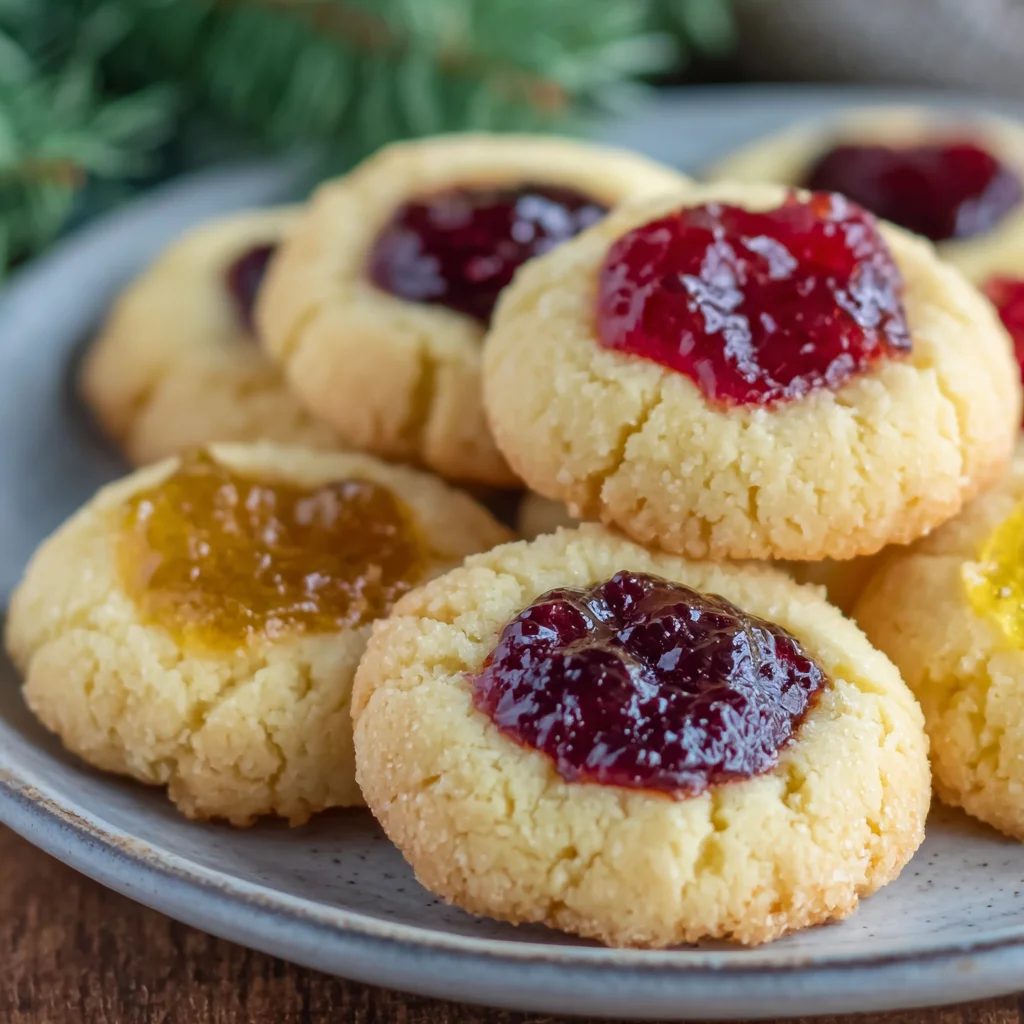
Christmas is a time for family, friends, and, of course, delicious treats! And what could be more festive and delightful than these perfectly buttery, melt-in-your-mouth Christmas Thumbprint Cookies? These little gems are incredibly easy to make, requiring minimal ingredients and even less effort. Their delicate texture and sweet, jam-filled centers make them an irresistible addition to any holiday gathering. Imagine the warm aroma filling your kitchen as these cookies bake, creating a cozy atmosphere perfect for Christmas baking. Whether you’re a seasoned baker or a novice in the kitchen, this recipe will guide you through each step, ensuring a successful outcome and a batch of Christmas cookies that will impress everyone.
Beyond their simple elegance, these cookies offer a wonderful canvas for personalization. Feel free to experiment with different types of jam, from classic raspberry to more adventurous flavors like apricot or even a tangy cranberry. The possibilities are endless, allowing you to create a unique and memorable cookie that truly captures the spirit of Christmas. You can even adapt this recipe to fit different dietary needs, as we will explore later in this guide. So, gather your ingredients, put on some festive music, and let’s get baking!
Why You’ll Love This Christmas Thumbprint Cookies Recipe
This recipe for Christmas Thumbprint Cookies is a winner for so many reasons! First and foremost, it’s incredibly easy. Even if you’re a baking beginner, you’ll find the steps straightforward and manageable. The ingredients are readily available at your local grocery store, eliminating any stressful last-minute shopping trips. The entire process, from mixing the dough to enjoying the finished cookies, can be completed in under an hour, allowing you more time to focus on the other aspects of your Christmas preparations. These cookies are also remarkably versatile. We’ll explore different jam fillings and variations later, so you can customize these cookies to perfectly suit your preferences and dietary needs. The classic combination of buttery cookie and sweet jam filling creates a taste sensation that’s both comforting and festive – a perfect balance of sweet and slightly tart. And let’s not forget the gorgeous presentation! These thumbprint cookies look stunning on a platter, instantly adding a touch of elegance to your holiday spread. They’re perfect for gifting to friends, neighbors, or colleagues – a homemade treat is always appreciated.
Beyond the taste and ease of preparation, making these Christmas Thumbprint Cookies is a wonderfully therapeutic experience. The process of mixing, shaping, and baking is incredibly calming and satisfying. It’s a great activity to do with family, particularly children, creating a fun and memorable Christmas tradition. The act of baking itself evokes feelings of warmth, comfort, and nostalgia, making it a wonderful way to connect with loved ones during the festive season. So, not only are these cookies delicious, but the process of creating them adds to the overall enjoyment of the holiday season. Plus, the aroma of freshly baked cookies is an irresistible Christmas sensory experience that you and your loved ones will truly savor.
Why You Should Try This Christmas Thumbprint Cookies Recipe
In a world of overly complicated baking recipes, this one stands out for its simplicity and delicious results. These Christmas Thumbprint Cookies are the perfect choice for those who want a stunning dessert without the hassle. They are an ideal option for novice bakers seeking a recipe with a high success rate. The simple yet elegant appearance makes them suitable for both casual gatherings and more formal holiday events. They’re easily customizable, allowing you to create a truly unique treat that reflects your personal taste. The recipe’s versatility extends beyond jam fillings; you can also experiment with add-ins to the dough itself, such as chocolate chips, nuts, or sprinkles, for even more creative variations. And lastly, who can resist the joy of making and sharing homemade cookies during the holidays? These thumbprint cookies are a guaranteed crowd-pleaser that will leave everyone wanting more.
This recipe is also a fantastic way to introduce children to baking. The simple steps and engaging process of creating the thumbprints are perfect for little hands. It’s a fun and educational activity that can help children develop their baking skills and confidence in the kitchen, creating happy memories during the holiday season. It’s a recipe that can easily become a cherished family tradition, passed down through generations, making each Christmas even more special. This is more than just a cookie recipe; it’s an opportunity to create lasting memories and share the joy of baking with loved ones – and isn’t that the true spirit of Christmas?
Ingredients and Necessary Utensils for Christmas Thumbprint Cookies
Before you embark on your Christmas Thumbprint Cookie baking journey, ensure you have all the necessary ingredients and utensils at your disposal. This meticulous preparation will contribute to a smooth and enjoyable baking experience.
Detailed List of Ingredients:
- 1 cup (2 sticks) unsalted butter, softened: Using softened butter is crucial for achieving a light and fluffy dough. Let the butter sit at room temperature for about an hour before starting. Avoid using melted butter, as this will alter the cookie’s texture.
- 1 cup granulated sugar: This provides sweetness and helps to create a tender crumb. Granulated sugar dissolves well into the butter, ensuring a smooth dough.
- 1 large egg: The egg acts as a binder, holding the ingredients together and adding moisture. Ensure your egg is at room temperature for optimal mixing.
- 1 teaspoon vanilla extract: This adds a delicious flavor and aroma. Pure vanilla extract is recommended for the best taste.
- 2 1/4 cups all-purpose flour: This is the primary structural component of the cookies. Using all-purpose flour provides a classic cookie texture. Be sure to measure the flour accurately, using a kitchen scale for the most precise results.
- 1/2 teaspoon baking powder: Baking powder helps the cookies rise slightly, creating a tender and airy texture. Don’t over-measure the baking powder, as this can result in overly puffy cookies.
- 1/4 teaspoon salt: Salt enhances the flavors of the other ingredients and helps balance the sweetness. Don’t skip the salt!
- 1/2 cup raspberry jam (or your favorite jam): This forms the delicious filling for your thumbprints. Choose a jam with a good consistency that won’t run too much while baking. You can find numerous jam recipes online, like this quick peach jam recipe or this homemade strawberry jam recipe, if you prefer homemade options. Explore different jams for a unique twist!
- 1/2 cup powdered sugar, for dusting: This adds a touch of sweetness and a beautiful finishing touch to your cookies.
Recommended Tools and Utensils:
- Electric mixer (handheld or stand): An electric mixer is highly recommended for creaming together the butter and sugar, ensuring a light and fluffy dough. This step is crucial for achieving the ideal cookie texture.
- Measuring cups and spoons: Accurate measurement of ingredients is essential for baking success. Use a kitchen scale for precision.
- Large mixing bowls (at least two): One bowl for creaming the butter and sugar, and another for whisking the dry ingredients.
- Whisk: A whisk is ideal for smoothly combining the dry ingredients.
- Baking sheets: Use at least two baking sheets to bake your cookies in batches. This prevents overcrowding and ensures even baking.
- Parchment paper: Line your baking sheets with parchment paper to prevent sticking and for easy cleanup.
- Measuring spoons: For accurate measuring of smaller quantities of ingredients like baking powder and salt.
- Rubber spatula or wooden spoon: For combining the wet and dry ingredients. Avoid overmixing.
- Cookie scoop (optional but recommended): A cookie scoop helps ensure uniform cookie sizes for even baking.
- Wire rack: For cooling the cookies completely after baking. This allows air circulation, preventing soggy cookies.
- Sifter (optional): Sifting the flour helps to aerate it and prevent lumps in the dough.
Detailed Recipe Steps for Christmas Thumbprint Cookies
Now, let’s delve into the step-by-step process of making these delectable Christmas Thumbprint Cookies. Following these instructions carefully will ensure you achieve perfectly baked, delightful cookies.
- Preheat your oven to 375°F (190°C). This is crucial for even baking. Preheating allows the oven to reach the correct temperature before the cookies go in, ensuring consistent results.
- Line your baking sheets with parchment paper. This prevents the cookies from sticking to the baking sheets and makes cleanup a breeze.
- Cream together the butter and sugar: In a large bowl, cream together the softened butter and granulated sugar using an electric mixer until the mixture is light and fluffy. This is the most important step for a light and airy cookie. Creaming incorporates air into the butter, which results in a tender crumb. Make sure your butter is properly softened; otherwise, it won’t cream properly.
- Add the egg and vanilla extract: Beat in the egg and vanilla extract until well combined. Scrape down the sides of the bowl to ensure all ingredients are incorporated.
- Combine the dry ingredients: In a separate bowl, whisk together the flour, baking powder, and salt. Sifting the flour (optional) can help prevent lumps in the dough.
- Gradually add the dry ingredients to the wet ingredients: Gradually add the dry ingredients to the wet ingredients, mixing on low speed until just combined. Be careful not to overmix, as this can develop the gluten in the flour and result in tough cookies. Mix only until the dry ingredients are just moistened.
- Shape the cookies: Roll the dough into 1-inch balls. You can use a cookie scoop for consistency. Place the balls onto the prepared baking sheets, leaving about 2 inches between each cookie. This spacing is important to prevent the cookies from spreading too much during baking.
- Make the thumbprints: Use your thumb to make an indentation in the center of each cookie ball. The indentation should be about 1/2 inch deep. Try to make the indentations fairly uniform for an attractive presentation.
- Fill with jam: Fill each indentation with about 1/2 teaspoon of raspberry jam (or your preferred jam). Don’t overfill, as the jam may overflow during baking.
- Bake: Bake for 10-12 minutes, or until the edges are lightly golden brown. Baking times may vary slightly depending on your oven, so keep a close eye on your cookies.
- Cool: Let the cookies cool on the baking sheets for a few minutes before transferring them to a wire rack to cool completely. Allowing the cookies to cool slightly on the baking sheets before transferring them prevents breakage.
- Dust with powdered sugar: Once the cookies are completely cool, dust them with powdered sugar. This step adds a final touch of sweetness and elegance.
Tips and Variations for Christmas Thumbprint Cookies
There’s plenty of room for creativity when it comes to these delightful cookies! Let’s explore some tips and variations to personalize your Christmas Thumbprint Cookies.
Ingredient Alternatives and Variations:
- Jam variations: Experiment with different fruit jams like apricot, strawberry, blackberry, cherry, or even a festive cranberry sauce. You can also try unique combinations like lemon curd or Nutella for a richer, decadent treat.
- Gluten-free version: Replace all-purpose flour with a gluten-free all-purpose blend. Make sure to use a blend specifically designed for baking. You may need to adjust the amount of flour slightly depending on the brand you choose.
- Vegan version: Replace the butter with a vegan butter substitute and the egg with a flax egg (1 tablespoon flaxseed meal mixed with 3 tablespoons water). Ensure your chosen vegan butter is firm enough to cream properly.
- Add-ins: Consider incorporating chopped nuts, chocolate chips, sprinkles, or dried cranberries into the cookie dough for added flavor and texture. Just remember to incorporate these ingredients after the initial mixing of the wet and dry ingredients.
- Spiced Cookies: Add a festive twist by incorporating 1/2 teaspoon of ground cinnamon or nutmeg into the dry ingredients. This will add a comforting warmth to your cookies.
Avoiding Common Mistakes:
- Overmixing the dough: Overmixing leads to tough cookies. Mix only until the dry ingredients are just moistened.
- Using cold butter: Cold butter will not cream properly, resulting in a dense dough. Ensure your butter is softened to room temperature.
- Overfilling the thumbprints: Overfilling the thumbprints can cause the jam to overflow during baking. Use about 1/2 teaspoon of jam per cookie.
- Overbaking: Overbaking will result in dry and crunchy cookies. Keep a close eye on your cookies and remove them from the oven when the edges are lightly golden brown.
- Not cooling completely: Allowing the cookies to cool completely on a wire rack before dusting with powdered sugar prevents the sugar from melting and creating a sticky mess.
Nutritional Values and Benefits of Christmas Thumbprint Cookies
While Christmas Thumbprint Cookies are undeniably indulgent, let’s take a look at their nutritional breakdown and the benefits of some of their key ingredients.
(Please note: Nutritional values are approximate and will vary depending on specific ingredients used. These values are based on a standard recipe and may not be completely accurate for variations.)
Per cookie (approximate):
- Calories: 100-120
- Protein: 1-2 grams
- Fat: 6-8 grams
- Carbohydrates: 15-18 grams
Benefits of key ingredients:
- Butter: Provides flavor and richness. Contains fat-soluble vitamins.
- Flour: Provides the structure of the cookie. A source of carbohydrates for energy.
- Sugar: Provides sweetness and energy. (Moderation is key, of course!)
- Egg: Binds the ingredients, adds moisture, and provides protein.
- Jam: Provides sweetness and antioxidants depending on the type of fruit used. Fruit provides vitamins and fiber.
It is important to consume these cookies in moderation, as part of a balanced diet.
FAQs about Christmas Thumbprint Cookies
FAQs
What are the most common ingredients in Christmas Thumbprint Cookies?
The core ingredients usually include butter, sugar, eggs, flour, baking powder, salt, and jam (typically raspberry, but other flavors work well too). These combine to create a delightful, melt-in-your-mouth texture and festive flavor.
How long do Christmas Thumbprint Cookies last?
Stored in an airtight container at room temperature, they’ll generally stay fresh for 3-5 days. For longer storage, you can freeze them for up to 2 months.
Can I make these cookies ahead of time?
Absolutely! You can make the dough a day or two in advance and store it in the refrigerator. Just bring it to room temperature before shaping and baking. You can also bake the cookies ahead and store them in an airtight container.
Are there any variations I can make to these Christmas Thumbprint Cookies?
Yes! Experiment with different jams, add nuts or chocolate chips to the dough, or even make them gluten-free or vegan. Let your creativity shine! Check out our other recipes, like these delicious Pumpkin Spice Sugar Cookies, for more inspiration.
Conclusion: Enjoy Your Christmas Thumbprint Cookies!
These Christmas Thumbprint Cookies are the perfect combination of festive cheer and delightful taste. Their simple elegance, ease of preparation, and endless customization options make them a must-try recipe for the holiday season. Remember to follow the steps carefully, utilize the tips and variations we’ve discussed, and most importantly, have fun creating these delightful treats! Share your baking journey with us in the comments section below. Don’t forget to share your beautifully baked cookies with your loved ones and tag us in your photos on social media! We’d love to see your creations. Happy baking and Merry Christmas!
For more delicious holiday recipes, check out our other festive treats on RecipesLiana.com! And for even more inspiration, visit our Pinterest board for Christmas baking: Pinterest Christmas Baking Recipes
Christmas Thumbprint Cookies
Ingredients
Equipment
Method
- Preheat oven to 375°F (190°C). Line baking sheets with parchment paper.
- Cream together the softened butter and granulated sugar until light and fluffy using an electric mixer.
- Beat in the egg and vanilla extract until well combined.
- In a separate bowl, whisk together the flour, baking powder, and salt.
- Gradually add the dry ingredients to the wet ingredients, mixing until just combined. Do not overmix.
- Roll the dough into 1-inch balls. Place onto prepared baking sheets, leaving about 2 inches between each cookie.
- Use your thumb to make a 1/2-inch deep indentation in the center of each cookie.
- Fill each indentation with about 1/2 teaspoon of jam.
- Bake for 10-12 minutes, or until the edges are lightly golden brown.
- Let cool on baking sheets for a few minutes before transferring to a wire rack to cool completely.
- Once cool, dust with powdered sugar.