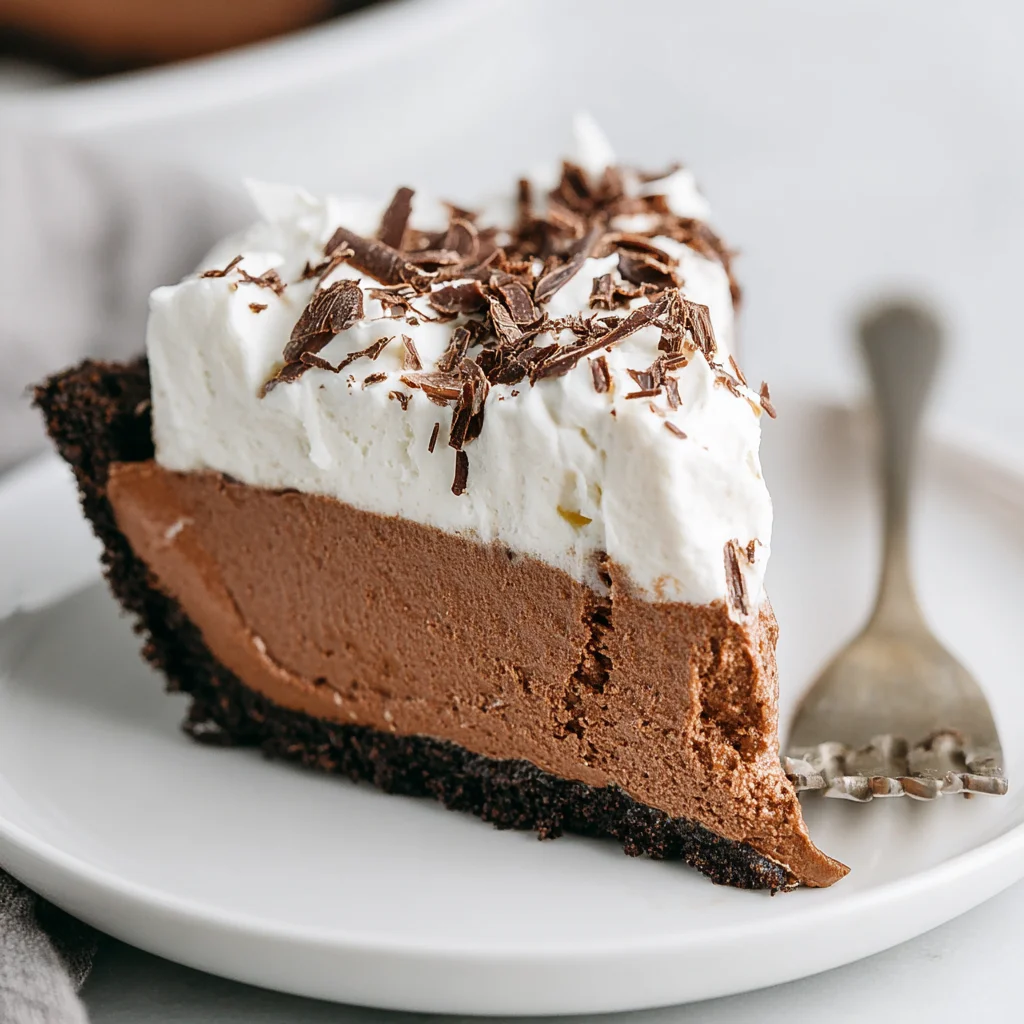
There are few desserts that instantly evoke a feeling of sophisticated indulgence quite like a classic chocolate silk pie. This isn’t just a regular chocolate pie; it is an experience in texture a crisp, buttery crust giving way to a filling so light, fluffy, and intensely chocolatey that it truly earns the name “silk.” If you have been searching for the definitive, creamy, Chocolate Silk Pie Recipe, look no further. This no-bake wonder requires simple pantry ingredients and relies heavily on one crucial technique to achieve that unmistakable, ethereal texture.
Forget store-bought versions. Our recipe guides you through creating a rich, deep-chocolate filling that sets up perfectly without any baking (beyond the initial crust). It is the perfect make-ahead dessert for holidays, celebrations, or when you simply need a truly decadent treat that will stun your family and guests. Let’s dive into the details of making the best Chocolate Silk Pie Recipe you will ever encounter.
Why You’ll Fall Head Over Heels for This Chocolate Silk Pie Recipe
The magic of chocolate silk pie lies in its stark contrast of textures and its unparalleled flavor intensity. Unlike dense fudge pies or gelatin-set puddings, a true chocolate silk pie feels weightless on the tongue, melting almost instantly and leaving behind a lingering, rich cocoa finish. This specific Chocolate Silk Pie Recipe elevates the standard by focusing on quality ingredients and critical mixing techniques.
Unmatched Texture: This is the defining characteristic. The filling is essentially a highly aerated chocolate buttercream that utilizes the emulsifying power of eggs to create volume and stability. When executed correctly, the filling is light, almost mousse-like, yet rich enough to feel luxurious. The satisfying snap of the slightly baked chocolate crumb crust provides the perfect counterpoint to the smooth filling.
Effortless Elegance: While the final presentation looks complex and sophisticated, this dessert is remarkably easy to assemble. The most demanding part is simply waiting for the pie to chill a true testament to the power of no-bake desserts. It’s the ideal recipe for home bakers who want a show-stopping result without hours of oven time or complicated stovetop work. When considering sophisticated, yet manageable recipes, this Chocolate Silk Pie Recipe consistently tops the list.
Intense Chocolate Flavor: We rely on 4 ounces of high-quality unsweetened baking chocolate, ensuring a deep, true cocoa flavor that is far superior to fillings made only with cocoa powder. This intensity is beautifully balanced by the sweetness of the powdered sugar and the richness of the butter, resulting in a complex flavor profile that appeals to true chocolate lovers. It’s a taste experience that moves beyond simple sweetness and into pure, concentrated chocolate bliss.
The Unforgettable Appeal: Why You Should Try This Classic Dessert
If you’ve hesitated to tackle a chocolate pie before, this Chocolate Silk Pie Recipe is the perfect starting point. It’s a reliable recipe that delivers fantastic results every time, provided you heed the critical safety and technique notes.
Safety First: The Raw Egg Factor
A traditional silk pie filling uses raw eggs to achieve its signature airy texture. Because the eggs are not cooked, it is absolutely essential to use pasteurized eggs for this recipe. Pasteurized eggs have been heat-treated to eliminate the risk of salmonella while maintaining the proteins necessary for emulsification and aeration. Using standard raw eggs in this Chocolate Silk Pie Recipe is highly discouraged for health and safety reasons. If you cannot find pasteurized eggs, you must substitute them with a safe alternative, such as an egg substitute product (like Just Egg) or a recipe modification that uses tempered eggs or cooked custard, though the texture will be slightly different.
A Crowd Pleaser for Every Occasion
Whether it’s a holiday feast, a birthday party, or a simple Sunday dinner, chocolate silk pie is universally loved. Its richness means that even small slices are satisfying, making it an economical choice for feeding a large group. The stunning layer of freshly whipped cream piled high on top provides a visually appealing finish, making it a centerpiece dessert with minimal effort. The contrasting textures the crispy crust, the airy filling, and the light whipped topping ensure every bite is delightful.
This Chocolate Silk Pie Recipe also offers fantastic make-ahead potential. The pie needs a minimum of six hours to chill and set, making it an excellent candidate for preparation one or even two days in advance. This frees up precious time on the day of your event, allowing you to focus on other cooking tasks or simply enjoy your guests. The stability of the butter-based filling ensures it holds up beautifully in the refrigerator.
For those who love effortless desserts, compare the simplicity of this pie to other complex baked goods. While recipes like layered cakes or intricate tarts demand precise oven temperatures and multiple cooling stages, this pie requires just a brief baking session for the crust, mimicking the ease found in popular no-bake treats. If you love quick, delicious assembly, you might also enjoy making a creamy No-Bake Peanut Butter Pie, which shares the same easy assembly principles.
Essential Ingredients and Tools for the Best Chocolate Silk Pie Recipe
Achieving the perfect silk pie starts with precise measurements and understanding the role of each ingredient. The quality of your components, especially the chocolate and butter, is paramount for a successful outcome.
Perfecting the Simple Crumb Crust
The crust is the foundation, and its structure must be sturdy enough to hold the airy, rich filling.
- 1 1/2 cups finely crushed chocolate cookie crumbs: While you can use graham crackers, using chocolate sandwich cookies (like Oreos, filling removed) deepens the cocoa flavor and creates a striking contrast with the pale filling once sliced. Ensure they are finely crushed; large chunks can make the crust too crumbly.
- 1/4 cup granulated sugar: Just enough to help the crust sweeten slightly and crisp up during baking.
- 6 tablespoons unsalted butter, melted: The binding agent. Using melted butter ensures the sugar and crumbs are evenly saturated, leading to a crust that bakes uniformly and holds its shape when chilling.
Key Ingredients for the Silky Filling
This is where the magic happens. Every component must be at the right temperature for proper emulsification.
- 1 cup (2 sticks) unsalted butter, softened to room temperature: This cannot be overstated. The butter must be truly softened not melted, not cold to properly cream with the powdered sugar and incorporate the air needed for the “silk” texture. Leave it out for at least 1-2 hours before starting the Chocolate Silk Pie Recipe.
- 1 1/2 cups powdered sugar, sifted: Sifting is mandatory. Powdered sugar tends to clump, and unsifted clumps will result in a grainy filling that contradicts the “silky” mandate.
- 4 ounces high-quality unsweetened baking chocolate, melted and cooled slightly: Use good-quality chocolate (like Ghirardelli or Baker’s) for the best flavor. Melt it gently and allow it to cool to lukewarm. If the chocolate is too hot, it will melt the creamed butter mixture and deflate the filling.
- 1 teaspoon pure vanilla extract: Enhances the depth of the chocolate flavor.
- 4 large eggs (Pasteurized is MANDATORY): As discussed, pasteurized eggs are crucial for safety in this Chocolate Silk Pie Recipe. They provide the structure and lightness when whipped vigorously.
Whipped Topping Perfection
The crown of the pie should be light, homemade, and perfectly stabilized.
- 1 1/2 cups cold heavy whipping cream: The cream must be very cold to whip successfully into stiff peaks.
- 1/4 cup powdered sugar: Sweetens the cream without adding graininess.
- 1/2 teaspoon pure vanilla extract: For flavor.
- Chocolate shavings, for garnish (optional): Use a vegetable peeler on a block of chocolate to create beautiful, delicate curls.
Utensils You’ll Need for This No-Bake Chocolate Pie
The key to the silk texture is aeration, which means powerful mixing equipment is necessary.
- Stand Mixer (Highly Recommended) or Hand Mixer: A stand mixer fitted with the paddle attachment is ideal for the long beating time required for the filling. A hand mixer will work, but you may need to beat for slightly longer and watch for overheating.
- 9-inch Deep-Dish Pie Plate: Crucial for accommodating the volume of the filling.
- Measuring Cups and Spoons: For accurate ingredient portions.
- Rubber Spatula: Essential for scraping down the sides of the bowl during the creaming process.
- Wire Rack: For cooling the crust completely.
Step-by-Step Guide: Mastering the Chocolate Silk Pie Recipe
Follow these steps precisely to achieve the signature light and airy consistency of a true chocolate silk pie.
Step 1: Crafting the Crunchy Foundation
- Preheat your oven to 350°F (175°C).
- In a medium mixing bowl, combine the finely crushed chocolate cookie crumbs and the 1/4 cup of granulated sugar.
- Pour the 6 tablespoons of melted butter over the crumb mixture. Stir thoroughly until the mixture is uniformly moistened and resembles wet sand.
- Press the mixture firmly and evenly into the bottom and up the sides of your 9-inch deep-dish pie plate. Tip: Use the bottom of a flat measuring cup or a glass to press the crust tightly against the dish. A well-compacted crust is less likely to crumble when slicing the pie.
- Bake the crust for 8 to 10 minutes until it looks set and smells fragrant. Remove it from the oven and allow it to cool completely on a wire rack before proceeding to the filling stage. Residual heat will ruin the silk filling.
Step 2: Achieving the Signature Silky Filling
This is the most critical stage of the Chocolate Silk Pie Recipe. Time and technique are everything here.
- Cream the Butter: Place the 1 cup of truly softened butter in the bowl of your stand mixer (paddle attachment). Cream on medium speed until the butter is smooth and lightened in color, about 1 minute.
- Add Sugar and Aerate: Gradually add the 1 1/2 cups of sifted powdered sugar. Beat on medium-high speed. The goal here is to introduce maximum air into the butter mixture. Continue beating for a full 4 to 5 minutes. The mixture should become very light, extremely fluffy, and significantly paler in color. Stop occasionally to scrape down the bowl, ensuring no sugar sits unmixed at the bottom.
- Incorporate Chocolate: Reduce the speed to low. Add the cooled, melted chocolate and vanilla extract. Beat until just combined, then increase to medium speed and beat for 1 minute to fully incorporate the chocolate. Scrape down the bowl one last time.
- Add Eggs Slowly: With the mixer running on medium speed, add the pasteurized eggs one at a time, beating well after each addition. The mixture may look slightly separated or loose initially don’t worry, this is normal.
- The Crucial 5-Minute Beat: Once all four eggs have been added, immediately increase the mixer speed to high. Beat the filling vigorously for a full 5 minutes. Do not skip this step. This long beating time emulsifies the eggs, butter, and sugar, incorporating massive amounts of air that result in the light, cloud-like “silk” texture. The mixture will lighten further in color and volume.
Step 3: Assemble and Chill the Pie
- Carefully spoon the prepared chocolate silk filling into the completely cooled pie crust. The filling will be voluminous and airy.
- Use a rubber spatula or the back of a spoon to gently smooth the top of the filling, being careful not to push all the air out.
- Cover the pie loosely with plastic wrap or foil. Ensure the covering does not touch the filling’s surface.
- Refrigerate the pie for a minimum of 6 hours, or preferably overnight. The chilling time is essential for the butter to firm up and the pie to fully set, making clean slicing possible. A proper chill guarantees the structure needed for this no-bake masterpiece. For another dessert that relies on crucial chilling time, try this Easy Chocolate Fudge.
Step 4: Preparing the Whipped Topping and Serving
- Just before serving, prepare the topping. Ensure your heavy whipping cream is ice cold. Place the cream, 1/4 cup powdered sugar, and 1/2 teaspoon vanilla extract in the clean, cold bowl of a stand mixer fitted with the whisk attachment.
- Beat on medium-high speed until stiff peaks form. The cream should hold its shape firmly. Stop immediately once peaks form to prevent turning the cream into butter.
- Spread the freshly whipped cream evenly over the chilled Chocolate Silk Pie Recipe. Alternatively, use a piping bag and large star tip for a decorative flourish.
- Garnish the top generously with chocolate shavings or cocoa powder. For more stunning presentation ideas, follow my inspiration board on Pinterest!
- Slice with a sharp, warm knife (wipe the knife clean between slices for the cleanest cuts) and serve immediately. Store any leftovers securely covered in the refrigerator.
Expert Tips, Troubleshooting, and Delicious Variations
To ensure your Chocolate Silk Pie Recipe is flawless every time, keep these key troubleshooting and customization notes in mind.
Avoiding Common Silk Pie Mistakes
- Grainy Filling: This is almost always caused by two things: 1) not sifting the powdered sugar, or 2) not beating the mixture long enough. The intense 4-5 minute creaming of the butter/sugar, followed by the 5-minute beat after the eggs are added, is non-negotiable for a smooth texture.
- Filling Deflates or Separates: This occurs if the chocolate was added while too hot, or if the butter was too warm (oily, not soft). Ensure the melted chocolate is only slightly warm to the touch.
- Runny Pie: A pie that doesn’t set is usually a result of insufficient chilling time, or if the butter was excessively warm during the mixing process, which prevents it from firming up fully in the fridge.
Flavor Variations on the Chocolate Silk Pie Recipe
While the classic version is perfect, you can easily adapt this base Chocolate Silk Pie Recipe to introduce other complementary flavors:
- Espresso Silk Pie: Add 1 teaspoon of instant espresso powder (or finely ground instant coffee) to the melted chocolate before incorporating it into the butter mixture. This deepens the chocolate flavor beautifully.
- Mint Chocolate Silk Pie: Replace the vanilla extract with 1 teaspoon of pure mint extract (or a combination of 1/2 teaspoon vanilla and 1/2 teaspoon mint). For the topping, use green food coloring in the whipped cream for a festive look.
- Salted Caramel Silk Pie: Drizzle homemade or high-quality salted caramel sauce over the top of the filling just before adding the whipped cream.
- Crust Variations: Instead of chocolate cookies, use ginger snaps, shortbread cookies, or even pretzel crumbs for a sweet-and-salty twist.
Dietary Adjustments: Gluten-Free and Vegan Options
You can easily adapt this Chocolate Silk Pie Recipe for various dietary needs:
- Gluten-Free: Simply use gluten-free chocolate sandwich cookies or graham crackers for the crust. The filling ingredients are naturally gluten-free.
- Dairy-Free/Vegan Silk Pie: This requires significant substitution in the filling. Swap the dairy butter for a high-quality, solid vegan butter stick (like Miyoko’s or Earth Balance sticks). Substitute the heavy cream with full-fat coconut cream (chilled overnight) or commercial vegan whipping cream. For the raw egg factor, you will need to replace the eggs entirely, likely utilizing a base of silken tofu, coconut cream, and agar-agar or cornstarch for thickening, as seen in many vegan pudding or mousse recipes. While the texture won’t be identical, it achieves the same richness. Finding delicious vegan alternatives for classic comfort foods is always a fun challenge, much like perfecting a Creamy Cucumber Pasta Salad or other creamy side dishes.
Understanding the Decadence: Nutritional Insights
A classic, homemade Chocolate Silk Pie Recipe is undeniably an indulgence, rich in fats and sugars. However, understanding the components helps appreciate the high-quality ingredients used.
Indulgence vs. Ingredients: Key Benefits
While this pie is a treat, the use of high-quality ingredients does provide certain advantages:
- Cocoa Antioxidants: Unsweetened baking chocolate is rich in antioxidants, specifically flavonoids, which are linked to improved heart health and reduced inflammation. By using a high concentration of unsweetened chocolate, we maximize the cocoa solids content.
- Healthy Fats from Dairy: The large quantity of butter and heavy cream provides saturated and monounsaturated fats. While moderation is key, these components contribute to the feeling of satiety, helping you feel satisfied with a smaller slice.
- Energy Source: The combination of fats and simple sugars (from the powdered sugar) makes this an excellent energy-dense treat, perfect for capping off a large meal or celebrating a special occasion.
Approximate Nutritional Breakdown (Per 1/8th of Pie)
Please note these are estimates based on standard calculations and ingredient averages. Actual values may vary based on exact brands and measurements used.
| Nutrient | Approximate Value |
|---|---|
| Calories | 450–550 kcal |
| Total Fat | 35–45 g |
| Saturated Fat | 20–25 g |
| Cholesterol | 120–150 mg |
| Carbohydrates | 30–40 g |
| Sugar | 25–35 g |
| Protein | 5–7 g |
This dessert is designed for flavor and enjoyment, not as a primary source of daily nutrients. Enjoy this classic Chocolate Silk Pie Recipe mindfully as a delicious celebratory treat.
FAQs About the Chocolate Silk Pie Recipe
How long does Chocolate Silk Pie need to chill?
The Chocolate Silk Pie Recipe requires a minimum chilling time of 6 hours in the refrigerator. However, chilling it overnight (10–12 hours) is highly recommended. This extended time ensures the butter-based filling is fully firm, allowing for clean, perfect slices.
Can I use regular cocoa powder instead of unsweetened baking chocolate?
While you can technically substitute, using unsweetened baking chocolate is essential for achieving the deep, rich flavor and the structural integrity of this specific Chocolate Silk Pie Recipe. Cocoa powder tends to yield a drier, less intense flavor and can make the filling less stable than melted baking chocolate.
Is it safe to eat raw eggs in Chocolate Silk Pie?
It is safe only if you use pasteurized eggs. Traditional recipes call for raw eggs, but due to health risks, using pasteurized eggs is mandatory for this Chocolate Silk Pie Recipe. Pasteurized eggs have been treated to eliminate harmful bacteria while retaining their necessary emulsifying properties.
Why do I have to beat the filling for 5 minutes after adding the eggs?
The 5-minute vigorous beating session is critical for aerating the mixture and emulsifying the fats and liquids. This process creates a stable, light foam, which is the secret behind the “silky” texture of the pie, preventing it from being dense or grainy. This technique defines a true Chocolate Silk Pie Recipe.
How should I store leftover Chocolate Silk Pie?
Leftover pie must be stored in the refrigerator, covered loosely with plastic wrap or foil. Because of the dairy and egg components, it should not be left at room temperature for more than two hours. The pie maintains its delicious flavor and texture for up to 3–4 days when properly chilled.
Final Indulgence: The Conclusion
Mastering this Chocolate Silk Pie Recipe is truly a milestone for any home baker. It’s a classic dessert that relies more on precise technique specifically, the long, vigorous beating time than on complex baking methods. The reward is an impossibly light, intensely chocolatey filling nestled inside a crunchy, dark crust, all topped with a cloud of fresh whipped cream.
We’ve covered every critical step, from ensuring your butter is perfectly softened to emphasizing the necessity of using pasteurized eggs for safety. Remember, the true secret to the “silk” is aeration; don’t skimp on the mixing time, and allow the pie the full time it needs to set in the refrigerator.
This dessert proves that elegance doesn’t require complexity. It’s the perfect finale for any dinner party, delivering maximum flavor and presentation with minimal fuss. Now that you have the complete guide to the best Chocolate Silk Pie Recipe, gather your high-quality ingredients and prepare to amaze everyone who tries a slice. I guarantee this will become a new staple in your dessert rotation. We hope you enjoy making (and eating!) this spectacular pie. If you try this recipe, please share your thoughts and photos in the comments below!