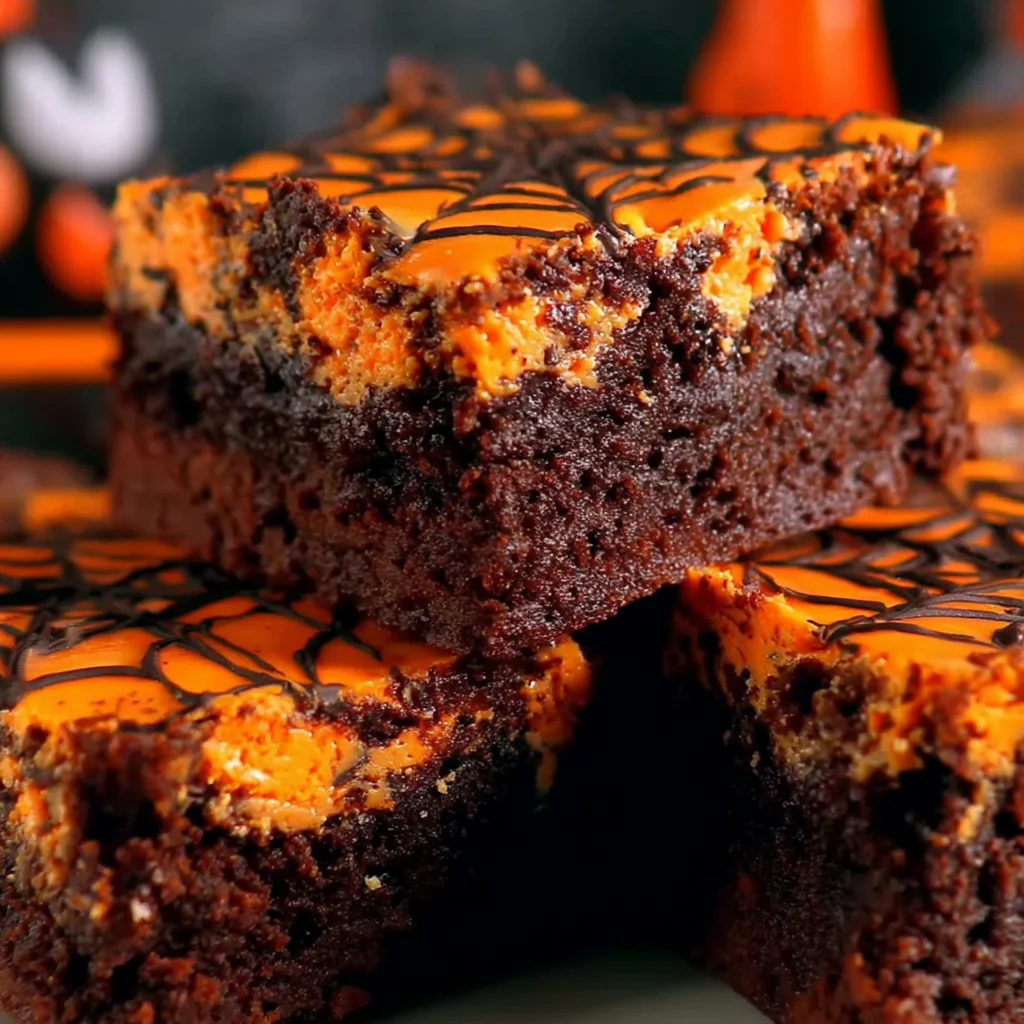
Get ready to cast a spell on your guests with these hauntingly delicious Spooky Spiderweb Halloween Brownies! These aren’t your average brownies; we’re talking fudgy, intensely chocolatey squares, topped with a chillingly elegant spiderweb design made from creamy white chocolate. Imagine the delighted screams (of joy, of course!) as you unveil this masterpiece at your Halloween gathering. This recipe is not just about deliciousness; it’s about creating a truly memorable Halloween experience, one bite at a time. From the ease of preparation to the stunning presentation, these brownies are guaranteed to become a new Halloween tradition. Whether you’re a seasoned baker or a kitchen novice, this recipe is designed to be accessible and fun, ensuring a deliciously spooky success for your Halloween celebration.
Why You’ll Love This Halloween Brownies Recipe
These Spooky Spiderweb Halloween Brownies are more than just a treat; they’re an experience. First and foremost, the flavor is phenomenal. The rich, decadent chocolate brownie base is intensely satisfying, with a perfectly fudgy texture that melts in your mouth. It’s the kind of brownie that disappears quickly, leaving everyone wanting more. But what truly sets these brownies apart is the stunning visual appeal. The intricate white chocolate spiderweb is not only beautiful but also surprisingly easy to create. Even if you’re not a cake decorating expert, you can achieve this impressive look with just a piping bag and a toothpick.
Beyond the taste and presentation, this recipe is incredibly versatile. You can easily customize it to suit your preferences. Want extra chocolate? Add more chocolate chips! Prefer a different type of chocolate? Go for it! Feeling adventurous? Try incorporating other Halloween-themed candies into the batter or the spiderweb design. The possibilities are endless. This recipe is also perfect for making ahead of time. You can bake the brownies a day or two in advance and decorate them right before serving, freeing up your time on Halloween day for more important things – like enjoying your spooky feast with friends and family!
Finally, and perhaps most importantly, these Halloween brownies are a guaranteed crowd-pleaser. They’re the kind of dessert that everyone will rave about, regardless of age or baking experience. They’re visually stunning, undeniably delicious, and surprisingly easy to make. What more could you ask for in a Halloween treat? This recipe is a surefire way to impress your guests and create lasting Halloween memories. They are perfect for Halloween parties, school events, or even a cozy night in with family. It’s a recipe that delivers on both taste and presentation, making it the ultimate Halloween dessert. Check out other delicious Halloween recipes on our site like our Apple Crisp Mini Cheesecakes for an additional delicious dessert option.
Why You Should Try This Spooky Spiderweb Halloween Brownies Recipe
Are you looking for a Halloween dessert that’s both delicious and visually stunning? Look no further! These Spooky Spiderweb Halloween Brownies tick all the boxes. They’re not just another store-bought treat; they’re a homemade masterpiece that will impress your friends and family. The recipe is surprisingly easy to follow, even for beginner bakers. The step-by-step instructions and helpful tips ensure that you’ll achieve perfectly fudgy brownies every time.
Imagine the joy on your guests’ faces when you unveil these beautifully decorated brownies. The intricate spiderweb design adds a touch of spooky elegance to your Halloween spread. It’s the perfect centerpiece for your dessert table, guaranteed to be a conversation starter. But it’s not just about aesthetics; the taste is equally impressive. These brownies are rich, chocolatey, and intensely satisfying. The perfect balance of sweetness and fudginess makes them irresistible.
Furthermore, this recipe is perfect for those who enjoy baking but don’t want to spend hours in the kitchen. The preparation is relatively quick and straightforward, allowing you to spend more time enjoying the Halloween festivities. You can even involve your kids in the decorating process, making it a fun family activity. So, why settle for boring, ordinary brownies when you can create these stunning and delicious Spooky Spiderweb Halloween Brownies? Give this recipe a try and let us know what you think! For additional recipe inspiration, why not check out our Chewy Maple Brown Sugar Cookies recipe?
Ingredients and Necessary Utensils for Halloween Brownies
Gathering the right ingredients and tools is crucial for baking success. This section details everything you’ll need to create your Spooky Spiderweb Halloween Brownies. Remember to check your pantry and gather everything before you begin!
Ingredients:
- 1 cup (2 sticks) unsalted butter, softened: Use good quality butter for the best flavor. Make sure it’s softened to room temperature for easy creaming.
- 1 ¾ cups granulated sugar: This provides the sweetness and helps create the fudgy texture.
- 4 large eggs: Eggs bind the ingredients and add richness.
- 1 teaspoon vanilla extract: Enhances the overall flavor.
- 1 cup all-purpose flour: Provides structure to the brownies.
- ½ cup unsweetened cocoa powder: The star ingredient! Use Dutch-processed cocoa for a richer, darker brownie.
- ½ teaspoon baking powder: Helps the brownies rise slightly.
- ¼ teaspoon salt: Balances the sweetness and enhances the flavors.
- 1 cup semi-sweet chocolate chips (optional): Adds extra chocolatey goodness.
- White chocolate candy melts: For creating the stunning spiderweb design. Choose a good quality brand for a smooth, glossy finish.
Utensils:
- 9×13 inch baking pan: This size is perfect for this recipe. Make sure it’s greased and floured to prevent sticking.
- Electric mixer (handheld or stand): Makes creaming the butter and sugar much easier and faster. You can do it by hand, but it will take more effort.
- Large mixing bowls (at least two): One for the wet ingredients and one for the dry ingredients.
- Whisk: For combining the dry ingredients.
- Rubber spatula or wooden spoon: For gently folding in the dry ingredients and chocolate chips.
- Wooden skewer or toothpick: For testing if the brownies are done.
- Piping bag or zip-top bag: For creating the spiderweb design. If using a zip-top bag, snip a small corner off to create a piping tip.
- Toothpick or thin knife: For dragging lines through the chocolate to create the spiderweb effect.
- Microwave-safe bowl (for melting the white chocolate): Follow the package instructions for melting the white chocolate.
- Measuring cups and spoons: Essential for accurate measurements.
Detailed Recipe Steps for Halloween Brownies
Follow these step-by-step instructions for perfectly spooky Halloween brownies!
- Preheat your oven to 350°F (175°C). This ensures the brownies bake evenly. Don’t skip this step!
- Grease and flour a 9×13 inch baking pan. This prevents sticking and ensures easy removal of the brownies after baking. Lightly coat the pan with cooking spray and then dust with flour, tapping out any excess.
- Cream together the butter and sugar: In a large bowl, cream together the softened butter and sugar until light and fluffy. Use an electric mixer for the best results. This process incorporates air into the batter, resulting in lighter, fluffier brownies. Make sure the butter is softened!
- Add eggs and vanilla: Beat in the eggs one at a time, then stir in the vanilla extract. Mix well after each addition. This ensures that the eggs are fully incorporated into the batter.
- Combine dry ingredients: In a separate bowl, whisk together the flour, cocoa powder, baking powder, and salt. Whisk until there are no lumps. This ensures even distribution of the dry ingredients in the batter.
- Gradually add dry ingredients to wet ingredients: Gradually add the dry ingredients to the wet ingredients, mixing until just combined. Be careful not to overmix. Overmixing can result in tough brownies. Mix only until the ingredients are just incorporated. A few lumps are okay.
- Stir in chocolate chips (optional): If using, gently fold in the chocolate chips. Don’t overmix; this will prevent the chocolate chips from sinking to the bottom.
- Pour batter into prepared pan: Pour the batter into the prepared pan and spread evenly. A spatula or offset spatula works well for this.
- Bake for 25-30 minutes: Bake for 25-30 minutes, or until a wooden skewer inserted into the center comes out with moist crumbs attached (it shouldn’t be completely clean). Baking times may vary depending on your oven, so start checking for doneness around the 25-minute mark.
- Cool completely: Let the brownies cool completely in the pan before frosting. This prevents the frosting from melting and ensures a clean, crisp spiderweb design.
- Make the spiderweb: Once the brownies are completely cool, melt the white chocolate candy melts according to package directions. Transfer the melted chocolate to a piping bag or a zip-top bag with a small corner snipped off. Pipe concentric circles of melted chocolate onto the brownies, starting from the center and working your way outwards. Then, using a toothpick or thin knife, drag lines from the center outwards through the chocolate circles to create the spiderweb effect.
- Let the spiderweb set: Allow the spiderweb to set completely before cutting and serving the brownies.
Tips and Variations for Halloween Brownies
Here are some tips and variations to make your Halloween Brownies even better:
- For extra fudgy brownies: Underbake them slightly. Check for doneness at 20-25 minutes.
- For chewier brownies: Use less flour. Reduce the flour by 1-2 tablespoons.
- Add nuts: Chopped walnuts or pecans would add a nice crunch.
- Use different chocolate chips: Milk chocolate, dark chocolate, or even white chocolate chips would work well.
- Add other Halloween candies: Miniature marshmallows, gummy worms, or candy corn could be added to the batter or used as decoration on top of the spiderweb.
- Make it vegan: Substitute the butter with vegan butter and the eggs with flax eggs (1 tablespoon flaxseed meal mixed with 3 tablespoons water per egg).
- Make it gluten-free: Substitute the all-purpose flour with a gluten-free flour blend.
- Don’t overmix the batter: This will result in tough brownies. Mix only until the ingredients are just combined.
- Let the brownies cool completely before frosting: This prevents the frosting from melting.
- Get creative with the spiderweb design: Use different colored candy melts or add edible Halloween sprinkles to personalize your spiderweb.
Nutritional Values and Benefits of Halloween Brownies
While Halloween brownies are undeniably indulgent, let’s explore the nutritional aspects and potential benefits of the ingredients:
Note: The exact nutritional information will vary depending on the specific brands and types of ingredients used. This is an approximate estimation.
Per serving (assuming 16 servings):
- Calories: Approximately 250-300
- Protein: Approximately 3-4 grams
- Fat: Approximately 15-18 grams
- Carbohydrates: Approximately 30-35 grams
Ingredient Benefits:
- Cocoa Powder: Rich in antioxidants, which can help protect against cell damage. It also contains flavonoids, which may have positive effects on heart health.
- Butter: Provides fat-soluble vitamins and contributes to the brownies’ rich texture.
- Eggs: Excellent source of protein, essential for building and repairing tissues. They also contain choline, which is important for brain health.
It’s important to remember that these brownies are a treat, and moderation is key. Enjoy them as part of a balanced diet.
FAQs
How far in advance can I make the Halloween brownies?
Can I substitute the white chocolate for another type of chocolate?
What if my brownies are overbaked?
Are these Halloween brownies gluten-free?
How do I store leftover Halloween brownies?
Conclusion
These Spooky Spiderweb Halloween Brownies are the perfect combination of spooky fun and delicious indulgence. Their rich chocolate flavor, fudgy texture, and stunning spiderweb design make them a showstopper at any Halloween gathering. This recipe is easy to follow, adaptable to various dietary needs, and guaranteed to impress your guests. Remember to share your creations with us on social media and let us know how yours turned out. Happy baking and Happy Halloween!
Don’t forget to check out our other amazing recipes at RecipesLiana.com! From savory dishes to sweet treats, we’ve got something for everyone. And for more Halloween inspiration, check out our Creamy White Chocolate Fudge recipe – another delicious Halloween option! Let us know in the comments below if you tried this recipe and what you thought. Share this recipe with your friends and family; we can’t wait to hear from you!
For more delicious recipe ideas and baking inspiration, follow us on Pinterest! Check out our Pinterest page!
Spooky Spiderweb Halloween Brownies
Ingredients
Equipment
Method
- Preheat oven to 350°F (175°C). Grease and flour a 9x13 inch baking pan.
- Cream together the softened butter and sugar until light and fluffy using an electric mixer.
- Beat in the eggs one at a time, then stir in the vanilla.
- In a separate bowl, whisk together the flour, cocoa powder, baking powder, and salt.
- Gradually add the dry ingredients to the wet ingredients, mixing until just combined. Do not overmix.
- Gently fold in the chocolate chips (if using). Pour batter into the prepared pan and spread evenly.
- Bake for 25-30 minutes, or until a wooden skewer inserted into the center comes out with moist crumbs.
- Let cool completely. Melt white chocolate. Transfer to a piping bag. Pipe concentric circles, then drag lines from the center outwards to create a spiderweb.
- Let the spiderweb set before cutting and serving.